Setting Up Payroll
Add employees, configure tax, and run your first payroll
Setting Up Payroll
Reading time: 10 minutes
Open the payroll workspace, add your first employee, and run your first pay cycle. By the end of this tutorial you will understand the payroll setup flow end to end. This walkthrough drives the real Atlas product — payroll screens are owner/admin-only, so sign in as an owner or admin.
Prerequisites
- An Atlas account with Admin or Owner role (payroll is restricted to these roles)
- Company tax identification numbers (EIN for US)
- Employee information: name, SSN, state, filing status, and pay details
Step 1: Open the Payroll Workspace
Payroll is built into Atlas — there is no module to switch on. Open Payroll from the sidebar to reach the Payroll home, organized into four tabs: Core, Benefits, Tax & Compliance, and Reports.
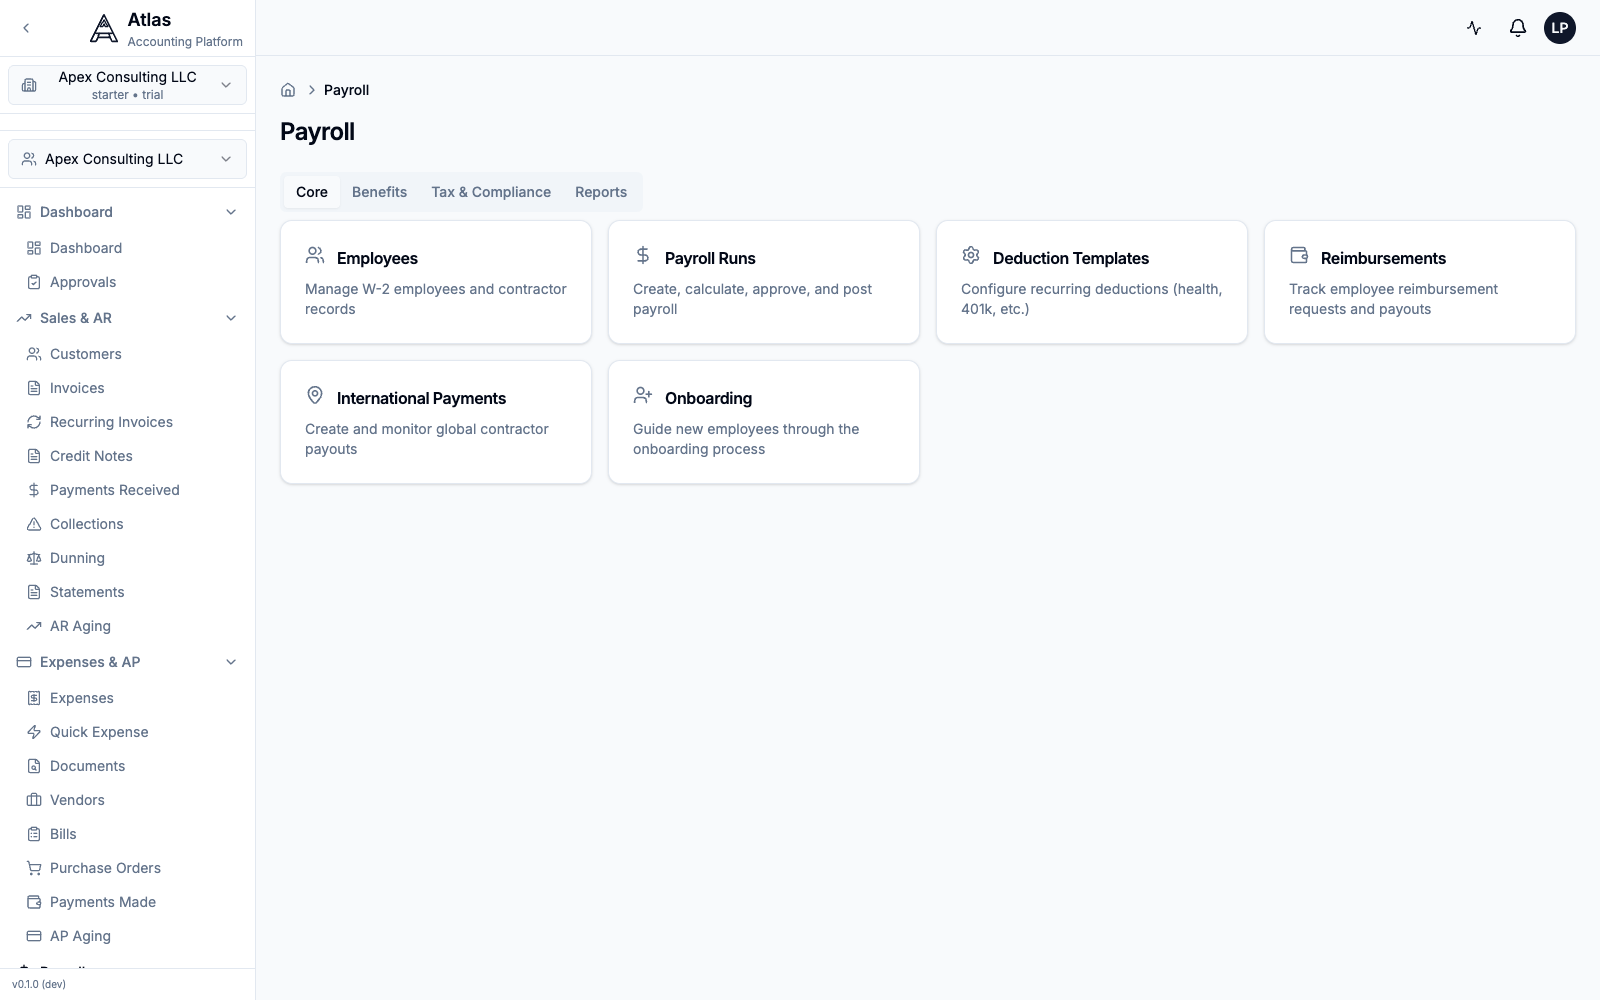 The Payroll home with Core, Benefits, Tax & Compliance, and Reports tabs and cards for Employees, Payroll Runs, Deduction Templates, Reimbursements, International Payments, and Onboarding.
The Core tab is where you'll spend most of your setup time: Employees, Payroll Runs, Deduction Templates, Reimbursements, International Payments, and Onboarding.
Step 2: Add an Employee
- Go to Payroll → Employees. Before you've added anyone, the list shows an empty state with a New Employee button.
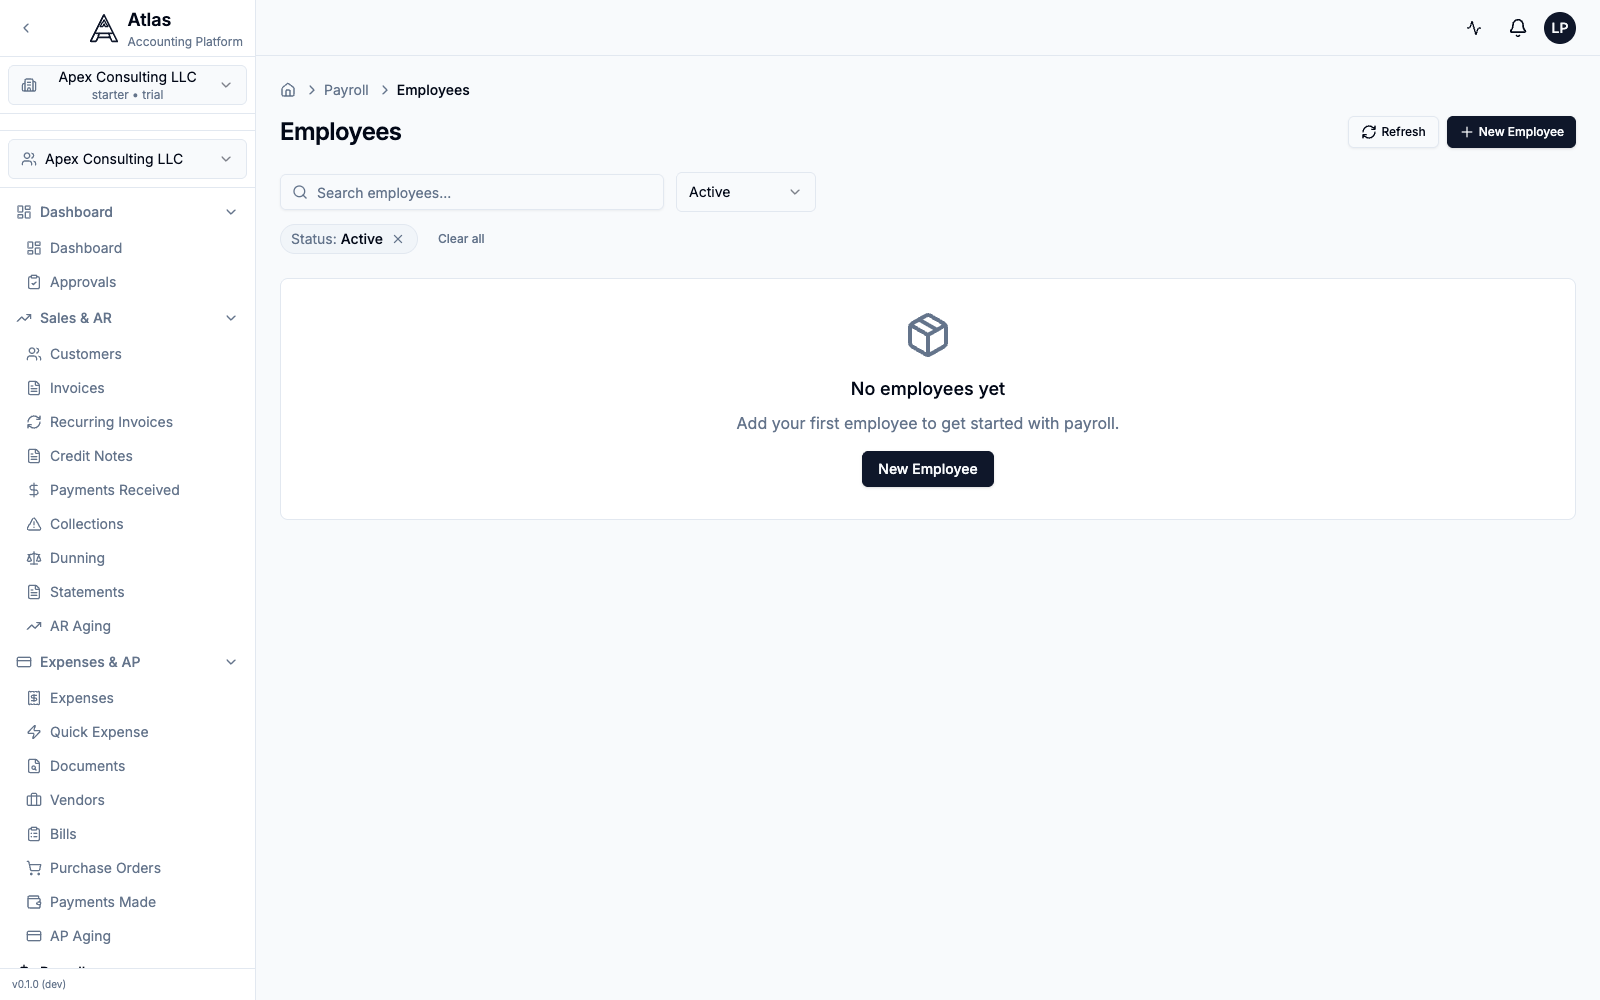 The Employees list with an empty state prompting you to add your first employee.
- Click New Employee and complete the form. The real form is grouped into three sections:
Personal Information
| Field | Description |
|---|---|
| First Name / Last Name | Legal name as it appears on tax forms |
| For paystub delivery and portal access | |
| Phone | Optional contact number |
| SSN | Social Security Number (XXX-XX-XXXX) |
| State Code | Work-state code (e.g., CA) |
Employment Details
- Pay Type — Salary or Hourly
- Annual Salary — total annual salary (Atlas divides it by the pay frequency for each run)
- Pay Frequency — Weekly, Biweekly, Semi-Monthly, or Monthly
- Filing Status — Single, Married Filing Jointly, Married Filing Separately, or Head of Household
- Hire Date
Cost Rates & Workers Compensation
- Workers Comp Class Code and Workers Comp Rate
- Benefits Rate and Overhead Rate (0–1) — used for fully-loaded cost reporting
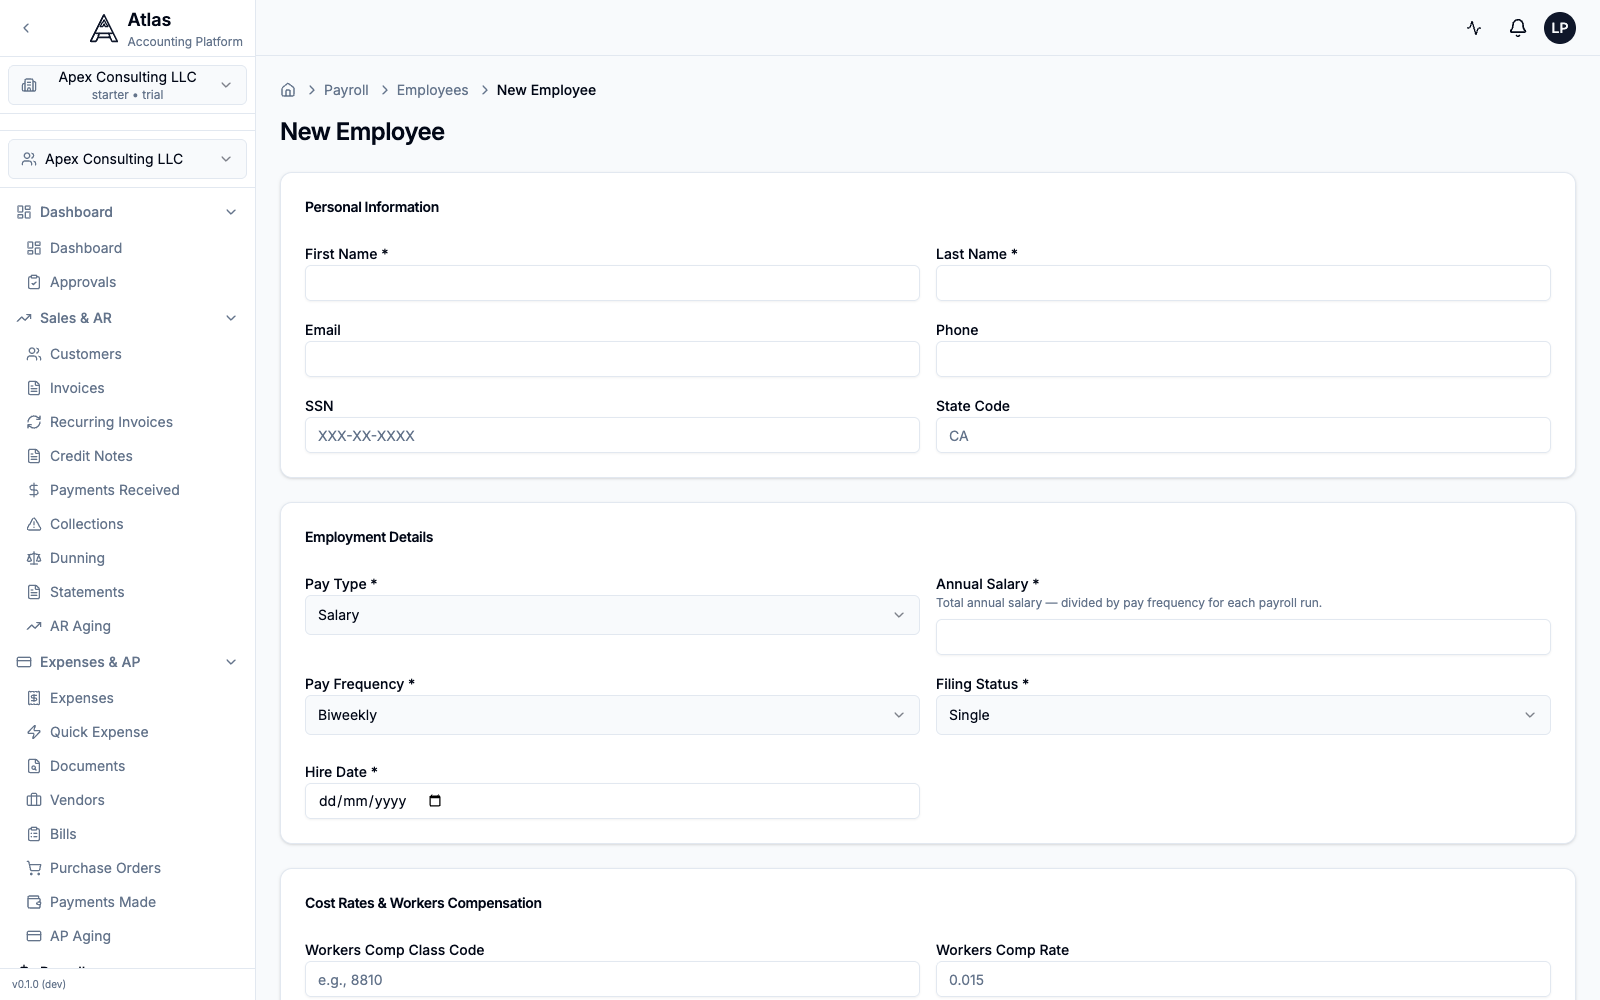 The New Employee form: Personal Information (name, email, SSN, state), Employment Details (pay type, salary, frequency, filing status, hire date), and Cost Rates & Workers Compensation.
- Click Create Employee.
Step 3: Configure Deductions
Recurring deductions are defined as reusable templates, not per-employee tabs.
- Go to Payroll → Deduction Templates (Core tab).
- Click New Template to define a recurring deduction (e.g., a health-insurance premium or 401(k) contribution) that you can apply to employees.
Garnishments and reimbursements have their own dedicated screens under the Benefits tab.
Step 4: Run Your First Payroll
- Go to Payroll → Payroll Runs. The page shows existing runs, an Auto-Draft from Approved Time card (which pre-populates a run from approved time entries for a period), and a Payroll Analytics Snapshot (anomalies, a 3-month forecast, and budget variance).
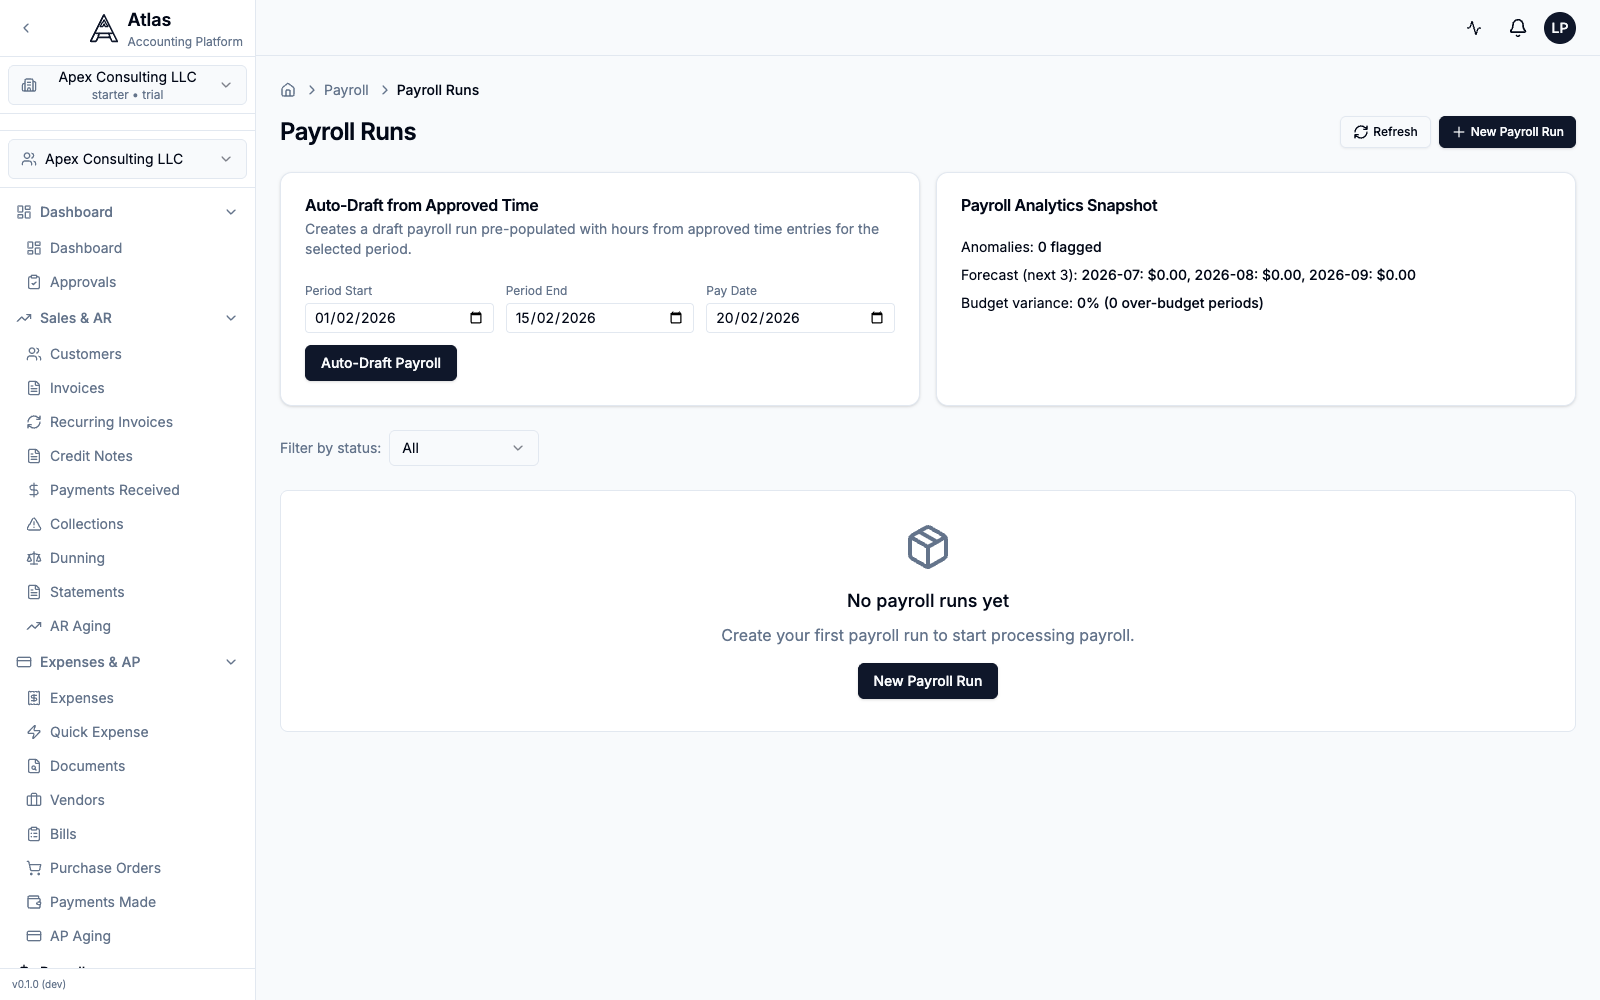 The Payroll Runs page with the Auto-Draft from Approved Time card, the Payroll Analytics Snapshot, and an empty-state prompt to create your first run.
- Click New Payroll Run and complete the form:
- Run Type — Regular, Supplemental, Off-Cycle, or Correction
- Employee — pick one, or tick Run for all eligible employees to let the backend auto-populate active employees
- Pay Period Type, Period Start, Period End, and Pay Date
- For hourly employees, enter Employee Hours and Pay Rate, then click Calculate to preview gross/net
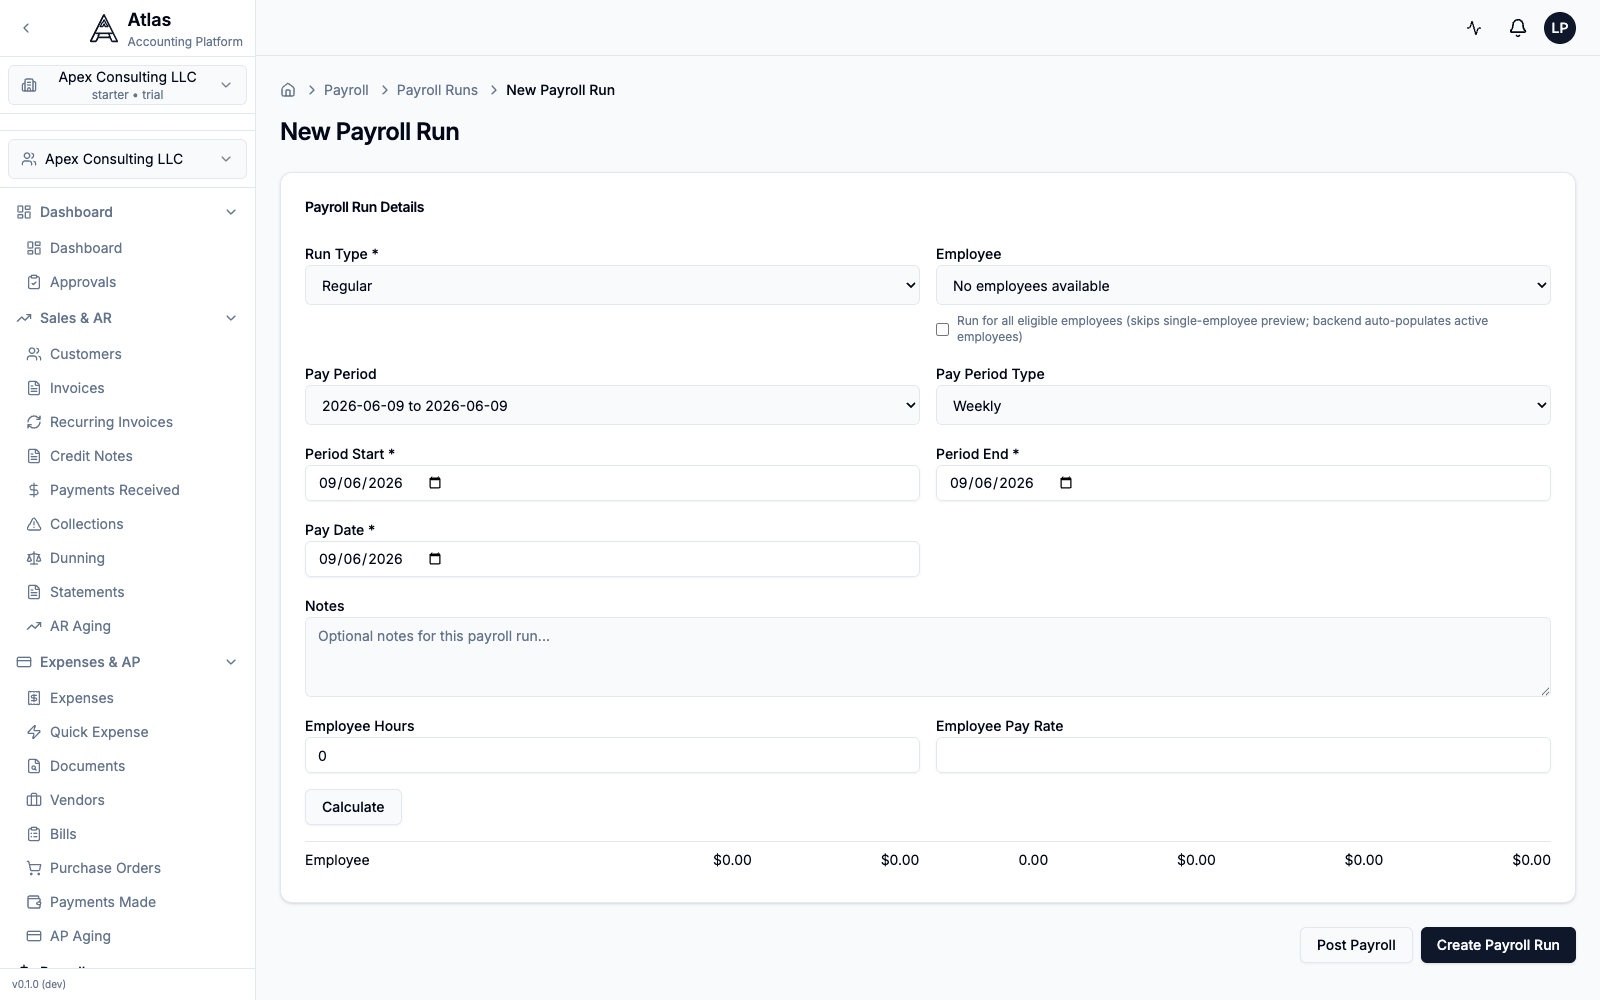 The New Payroll Run form: Run Type, employee selection, pay-period fields, the hours/rate calculator, and the Create Payroll Run / Post Payroll buttons.
- Click Create Payroll Run to save a draft. Review the calculated lines, then click Post Payroll to finalize.
What happens behind the scenes: posting a payroll run creates journal entries for salary expense, tax liabilities, deduction liabilities, and the cash disbursement — all balanced in double-entry.
Step 5: Review Paystubs
After a run is posted:
- Open the completed run from Payroll → Payroll Runs.
- Open an employee's line to view their paystub — earnings, tax withholdings, deductions, net pay, and year-to-date totals.
Employees with self-service access can view their own paystubs under their payroll self-service area.
Step 6: Tax Filing Calendar
Atlas tracks your payroll tax obligations. Open Payroll → Tax Calendar (under the Tax & Compliance group) to see Upcoming Tax Deadlines with their type, due date, amount, and status — for example EFTPS deposits, Form 941, and Form 940.
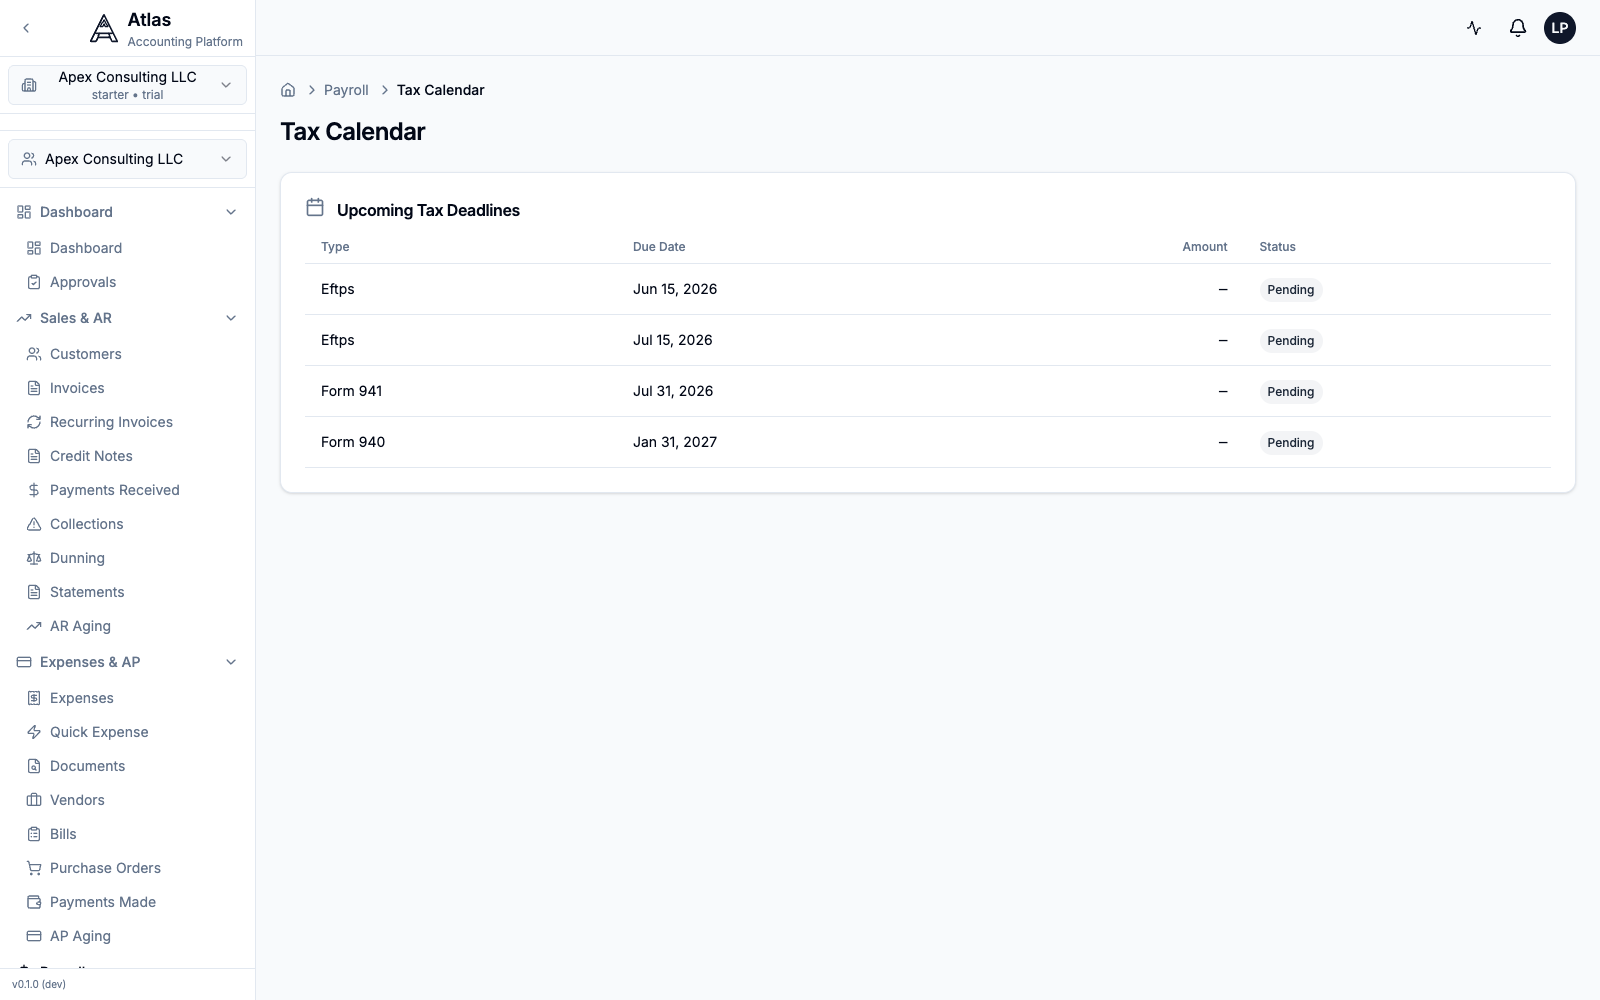 The Tax Calendar listing upcoming payroll tax deadlines — EFTPS deposits, Form 941, and Form 940 — each with a due date and Pending status.
Other compliance screens (State Tax Filings, Tax Reports, W-2 Forms) live alongside the Tax Calendar under Payroll → Tax & Compliance.
Troubleshooting
| Issue | Solution |
|---|---|
| Can't see Payroll | Payroll is owner/admin-only — sign in with an Owner or Admin account |
| Tax calculations seem wrong | Verify the employee's Filing Status, State Code, and Annual Salary |
| Payroll run has no employees | Add employees first (Step 2), or tick Run for all eligible employees |
| Payroll run stuck in Draft | Open it, review the lines, then click Post Payroll |
Related Guides
- Payroll Setup Guide — pay schedules, benefits, and international payroll
- Tax Compliance — tax filing requirements by jurisdiction
- Reports & Analytics — payroll expense reports
What's Next
After your first payroll:
- Add remaining employees under Payroll → Employees
- Set up deduction templates and benefits under the Benefits tab
- Use Auto-Draft from Approved Time to speed up recurring runs
- Review payroll reports under Payroll → Payroll Reports