Multi-Company Setup
Create companies and generate consolidated reports
Multi-Company Setup
Reading time: 8 minutes
Create multiple companies within your Atlas organization and generate consolidated reports. By the end of this tutorial you will have two or more companies with independent books and a consolidated view across all of them. These screens are owner/admin-only; sign in as an owner or admin.
Prerequisites
- An Atlas account with Owner or Admin role
- Business details for each company (name, tax ID, base currency)
Step 1: Understand the Atlas Multi-Tenant Model
Atlas uses a three-level hierarchy:
| Level | Description |
|---|---|
| Organization | Your top-level account — billing, users, and settings |
| Company | An independent set of books — its own COA, transactions, and reports |
| User | A person with role-based access to one or more companies |
Each company has completely isolated data enforced at the database level. Users can be granted different roles in different companies.
Step 2: Create a New Company
- Open Settings → Companies. Each company card shows its base currency, fiscal-year start, and accounting method, with Edit and delete actions.
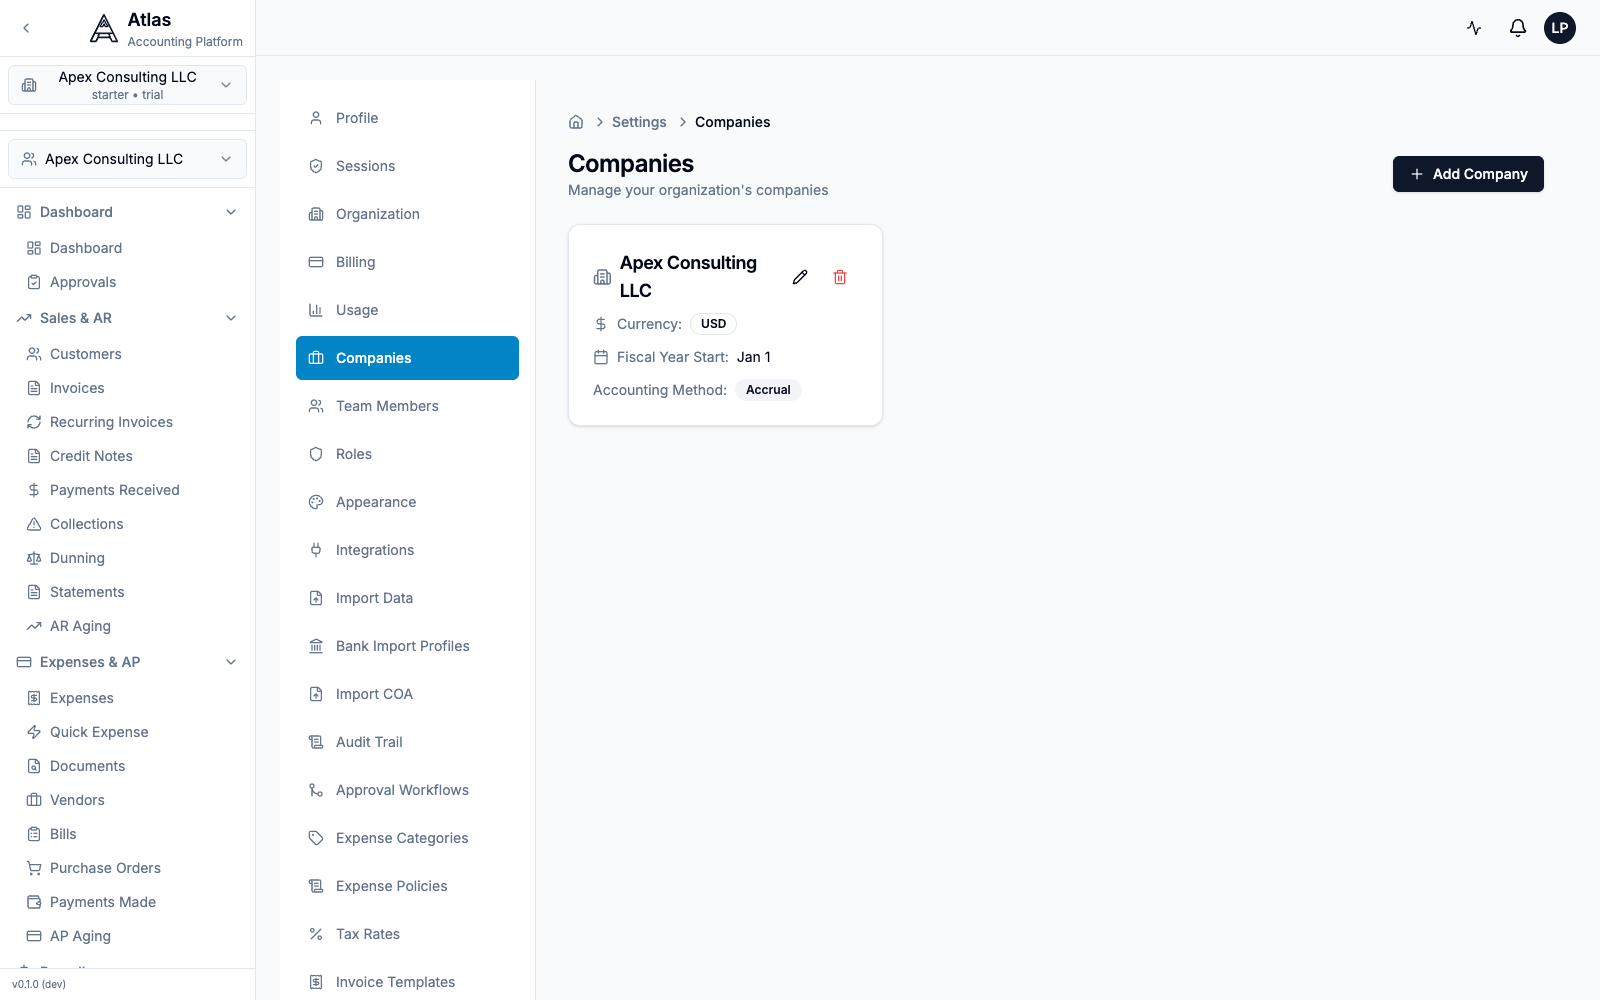 The Companies settings page listing the organization's companies, each with currency, fiscal-year start, and accounting method, plus an Add Company button.
- Click Add Company and fill in the details:
| Field | Description |
|---|---|
| Country | Determines tax/locale defaults |
| Company Name | Legal business name |
| Base Currency | Primary operating currency |
| Fiscal Year Start Date | First day of the fiscal year |
| Accounting Method | Accrual or Cash |
| Timezone | Used for timestamps and reporting cut-offs |
- Click Create Company.
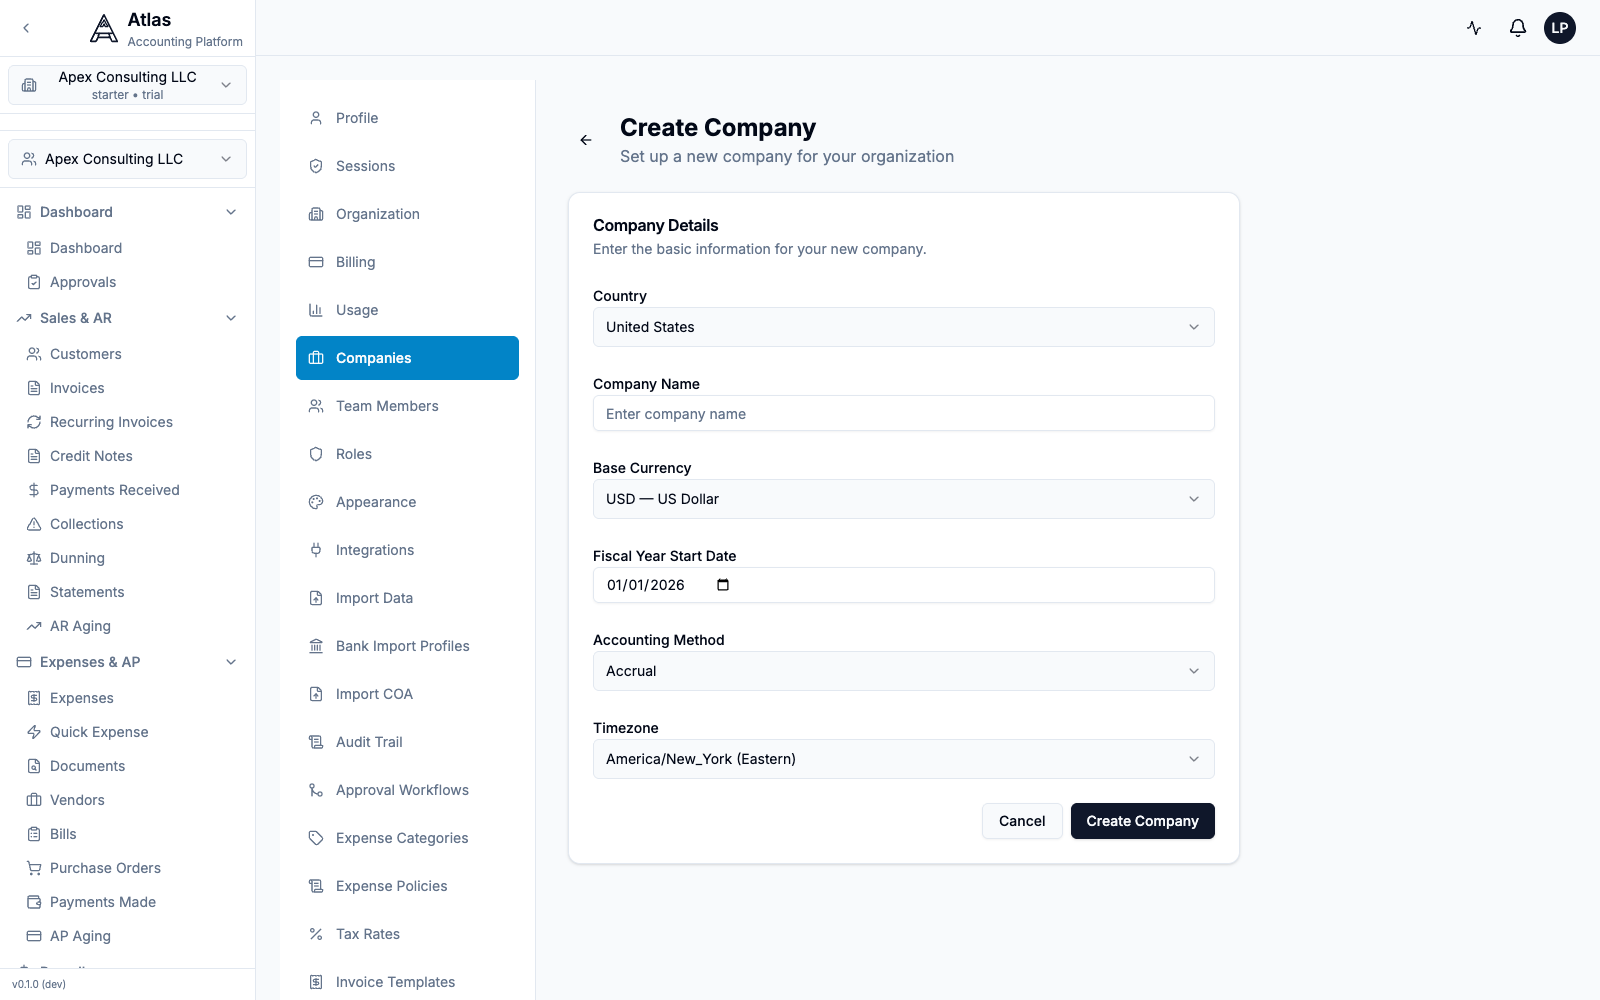 The Create Company form with Country, Company Name, Base Currency, Fiscal Year Start Date, Accounting Method, and Timezone fields.
Step 3: Configure Company Settings
- On Settings → Companies, click the Edit (pencil) icon on a company card.
- The Edit Company page is grouped into:
- Company Details — Country, Company Name, Base Currency, Fiscal Year Start Date, Accounting Method, Timezone
- Tax Identifiers — tax registration numbers for the company
- Report Preferences — e.g., the default zero display in reports
- Click Update Company to save.
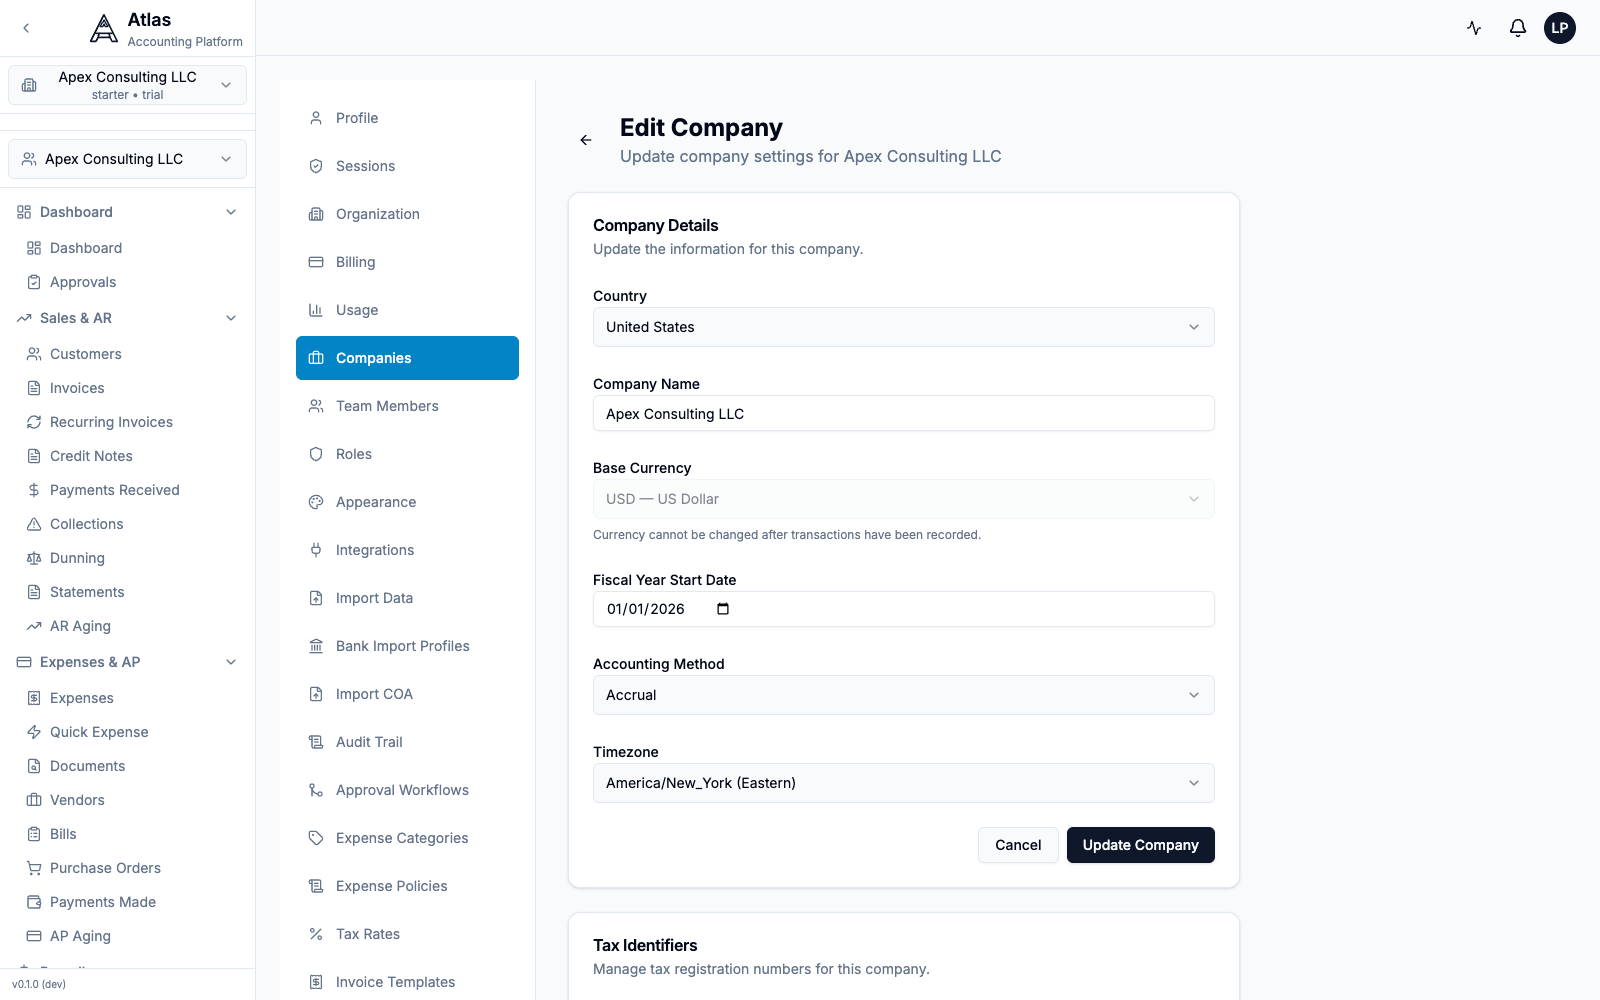 The Edit Company page showing the Company Details section, with a note that base currency cannot be changed after transactions are recorded.
Note: the Base Currency cannot be changed after transactions have been recorded, so choose it carefully when you create the company.
Step 4: Invite Users to the Company
- Go to Settings → Team Members. The page lists Active Members with their roles and any Pending Invitations.
- Click Invite User, enter the user's Email Address, and choose a Role — Admin, Accountant, Bookkeeper, or Viewer.
- Click Send Invite.
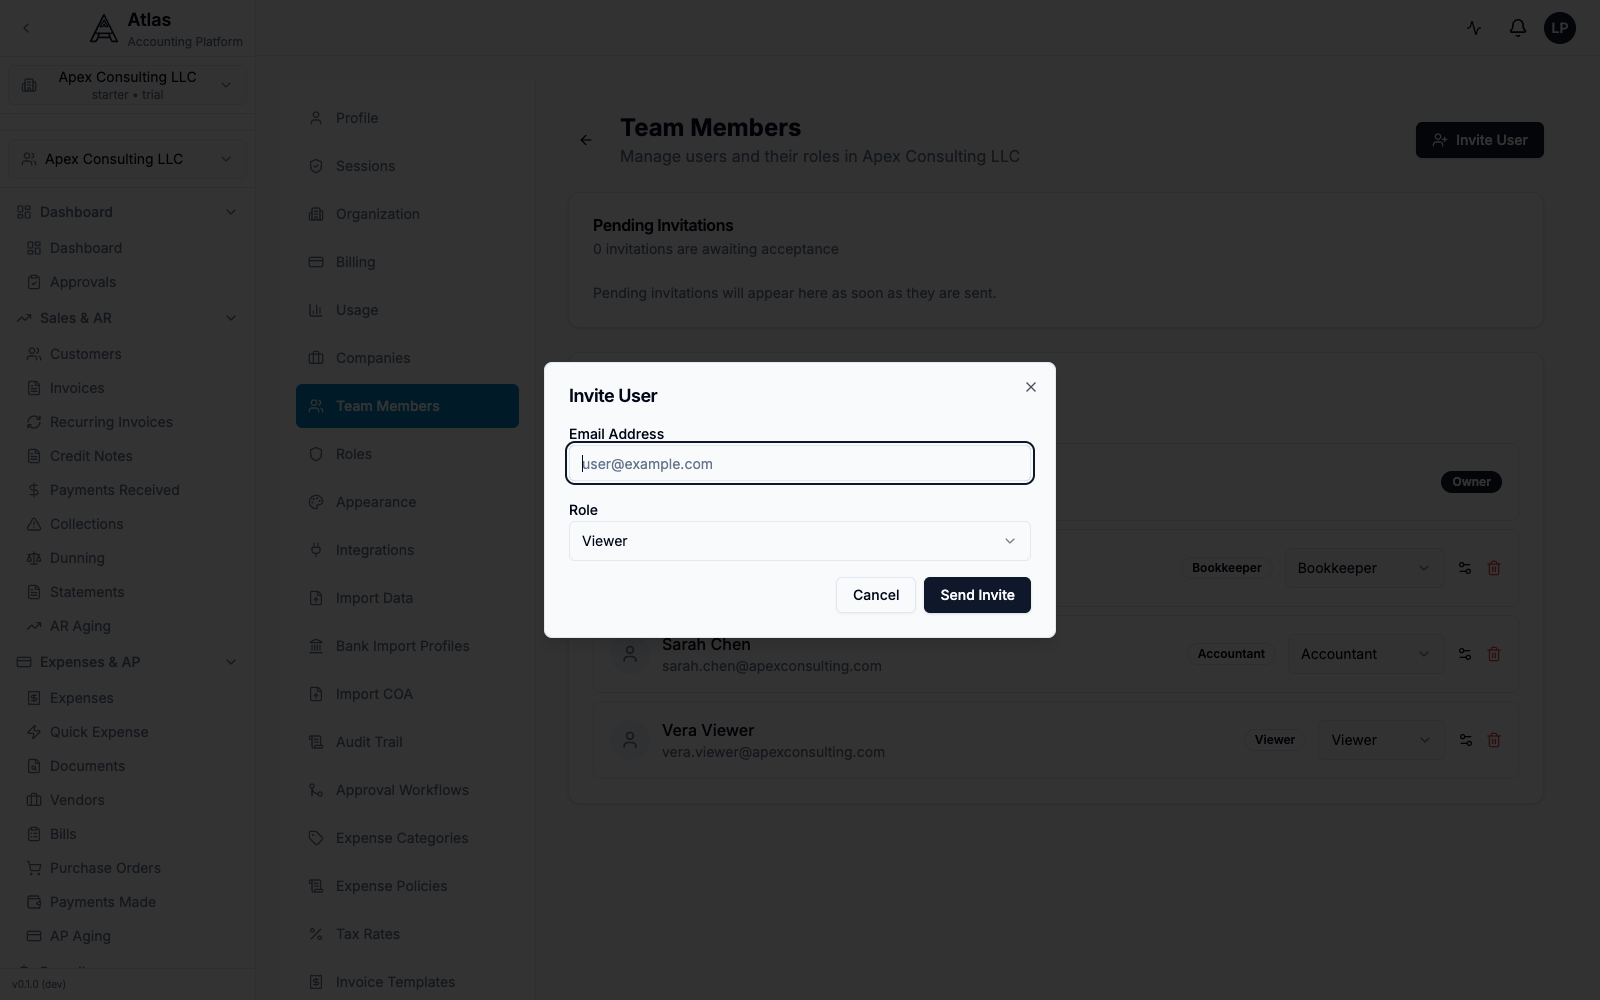 The Invite User dialog over the Team Members list, with an Email Address field and a Role selector, plus the existing members and their role badges.
Roles: the full hierarchy is owner > admin > accountant > bookkeeper > viewer > employee. Owner belongs to whoever created the organization and isn't an invite option; the invite dialog offers Admin, Accountant, Bookkeeper, and Viewer. You can change a member's role from the dropdown next to their name.
Step 5: Switch Between Companies
Use the company switcher at the top-left of the sidebar to move between companies:
- The current company name (and plan) is shown at the top
- Click to see every company you have access to
- Switching is instant — no logout required
- Each company has its own dashboard, transactions, and reports
Step 6: Run Consolidated Reports
Consolidated reporting lives in its own set of routes under Reports → Consolidated (e.g., /reports/consolidated/trial-balance) — you don't toggle it on a single-company report. Each consolidated report works the same way:
- Open the consolidated report you want (Trial Balance, Balance Sheet, Profit & Loss, or Cash Flow).
- Select at least two companies in the company picker.
- Set the As of date and the reporting Currency, and optionally turn on Include Eliminations to net out intercompany activity.
- Click Generate.
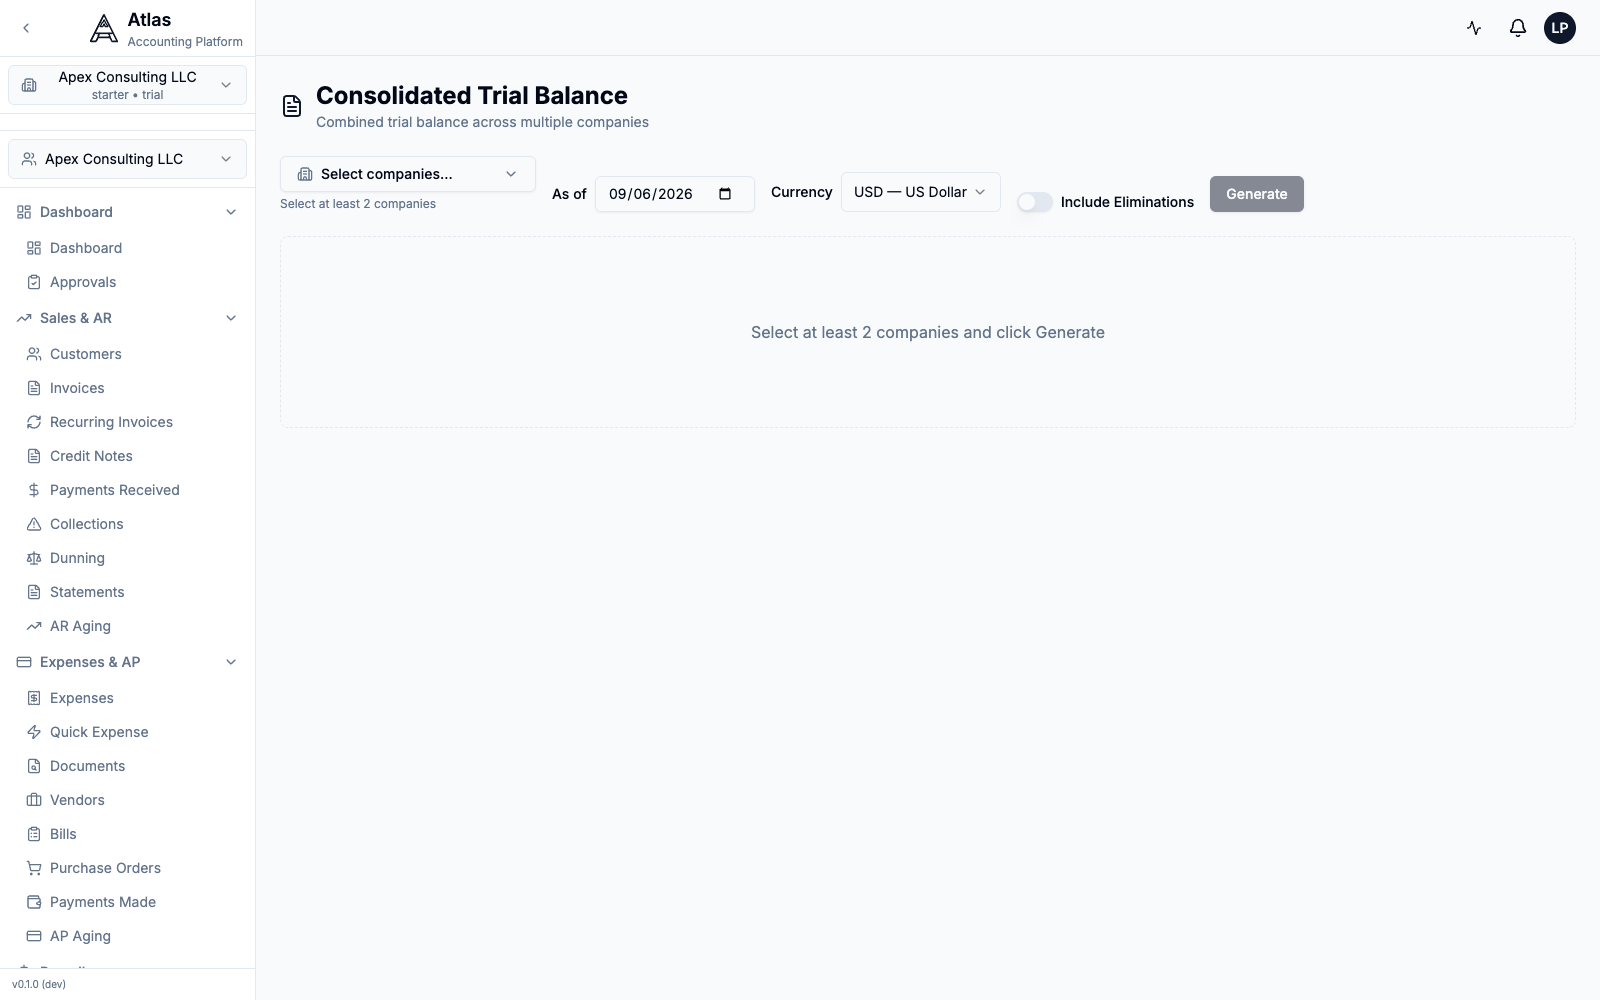 The Consolidated Trial Balance page with a company picker, As-of date, Currency selector, an Include Eliminations toggle, and a Generate button.
Available Consolidated Reports
| Report | What it combines |
|---|---|
| Trial Balance | Combined trial balance across companies |
| Balance Sheet | Assets, liabilities, and equity combined |
| Profit & Loss | Revenue and expenses combined by account |
| Cash Flow | Cash movements across all companies |
| Intercompany | Intercompany activity and eliminations |
Consolidation requires two or more companies — the report won't generate for a single company.
Intercompany Transactions
If your companies transact with each other:
- Record the transaction in both companies using journal entries
- Use designated intercompany accounts (e.g., "Due To/From [Company Name]")
- These are automatically eliminated in consolidated reports
Best practice: Create matching intercompany receivable and payable accounts in each company's Chart of Accounts for clean elimination.
Troubleshooting
| Issue | Solution |
|---|---|
| No Add Company button | Company creation is owner/admin-only — sign in with an Owner/Admin account |
| User cannot see a company | Invite them under Settings → Team Members |
| Consolidated report won't generate | Select at least two companies, then click Generate |
| Consolidated report shows wrong amounts | Verify base currencies, exchange rates, and Include Eliminations |
Related Guides
- RBAC & Permissions — managing roles across companies
- Multi-Currency — handling foreign currency in multi-company setups
- Reports & Analytics — consolidated reporting options
What's Next
After setting up multiple companies:
- Configure intercompany accounts for transactions between entities
- Run the Consolidated reports under Reports → Consolidated across your companies
- Invite your team with appropriate roles per company under Settings → Team Members