Your First Invoice
Create, send, and track your first customer invoice
Your First Invoice
Reading time: 8 minutes
Create, send, and track your first customer invoice in Atlas. By the end of this tutorial you will have a customer, an invoice, and a recorded payment — all reflected in your general ledger. Every screen below is the actual product.
Prerequisites
- An Atlas account with Bookkeeper role or above
- At least one company set up in your organization
- A Chart of Accounts with an Accounts Receivable account
Step 1: Create a Customer
- Open Sales & AR → Customers from the sidebar. Each customer shows its number, name, type, email, balance, and payment terms.
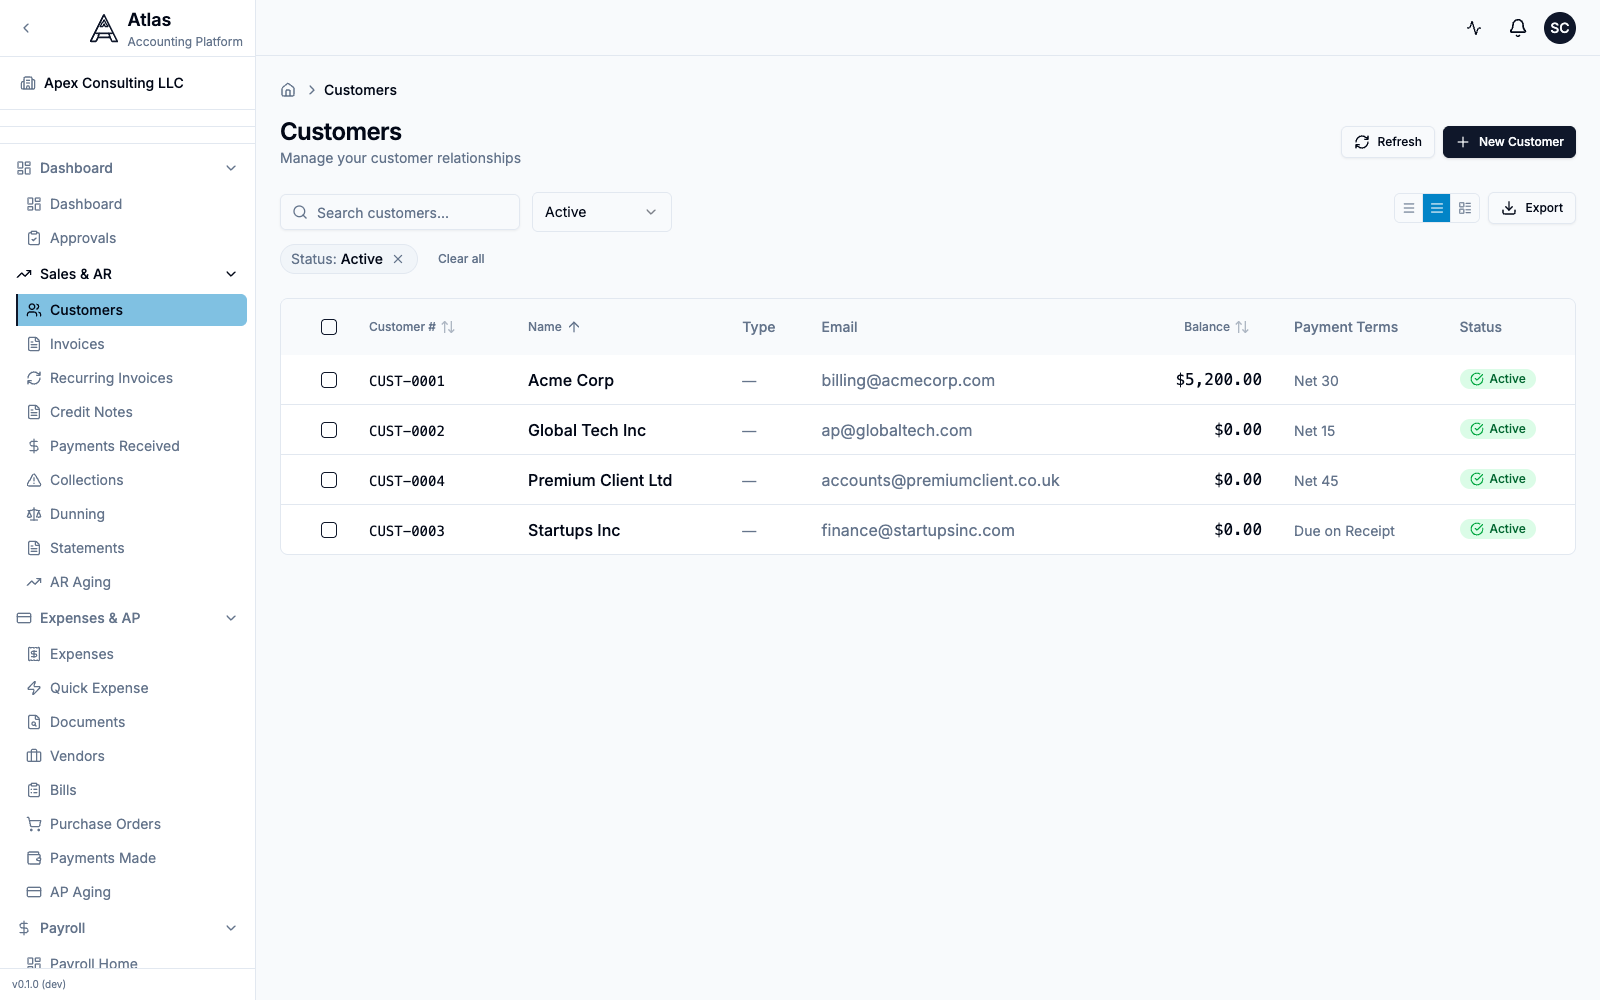 The Customers list under Sales & AR, with seeded customers and their balances and payment terms.
- Click New Customer.
- Fill in the form:
- Display Name (required) — your customer's business or personal name
- Customer Type — Business or Individual
- Email — used for sending invoices electronically
- Currency — defaults to your company's base currency (USD)
- Click Create Customer.
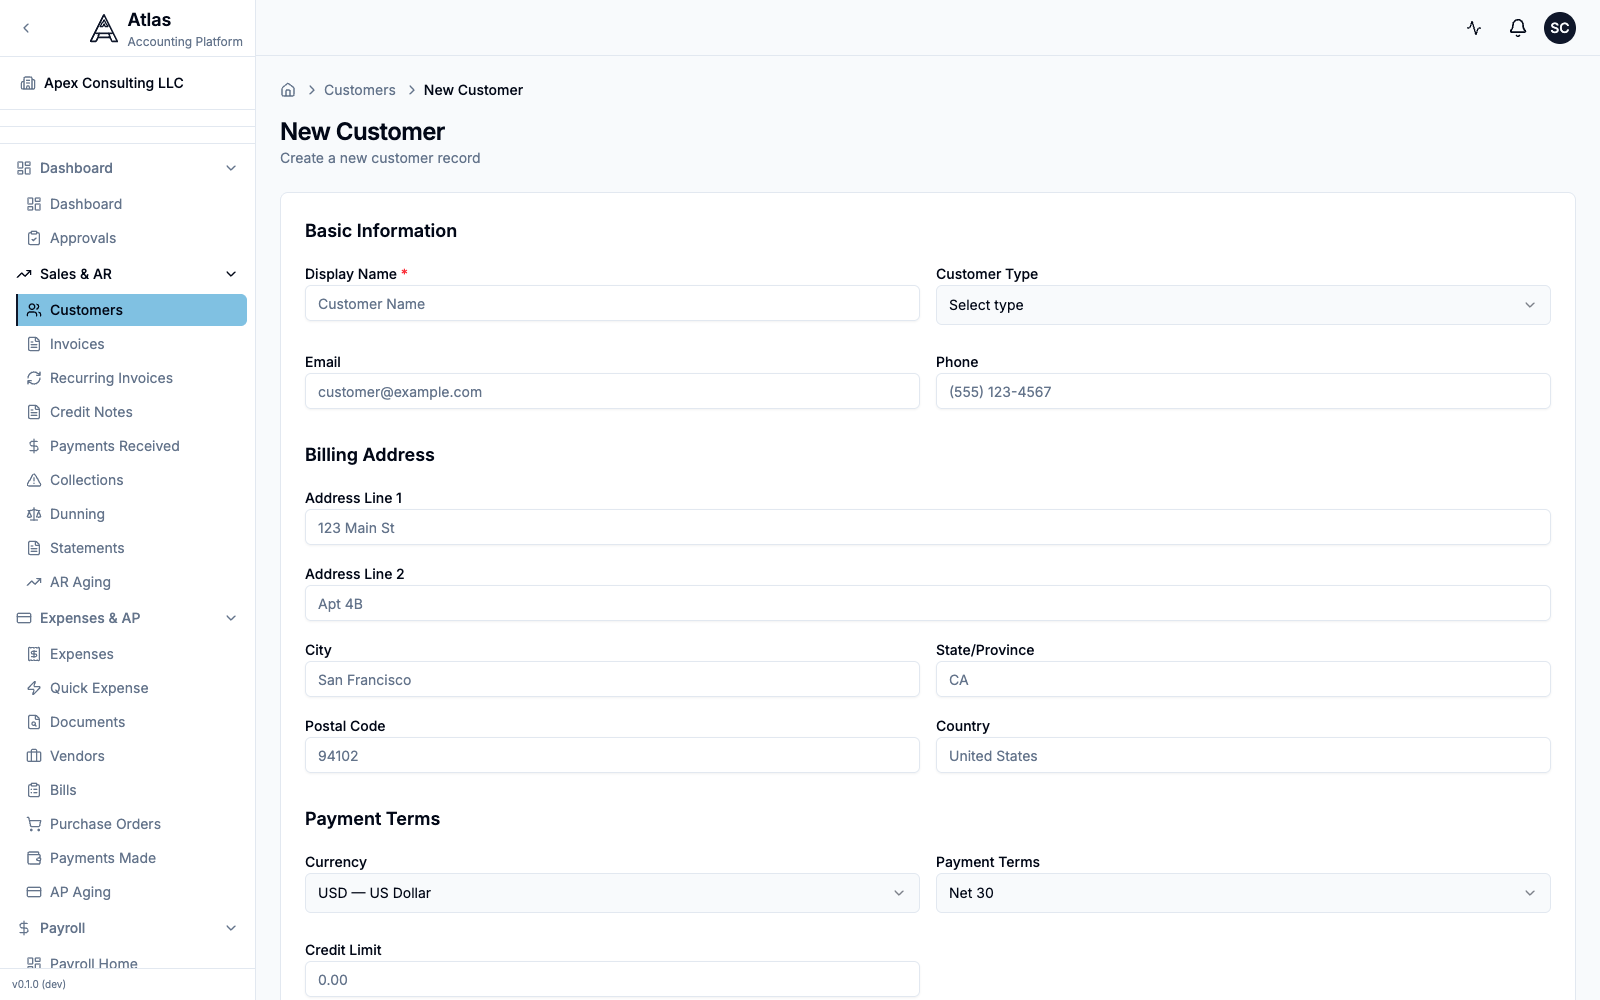 The New Customer form: Display Name and Customer Type, Email/Phone, a Billing Address block, and Payment Terms (currency + terms).
Tip: Add a billing address now — it will auto-populate on every invoice you create for this customer.
Step 2: Create an Invoice
- Go to Sales & AR → Invoices and click New Invoice.
- Choose the Accounts Receivable Account at the top. It's optional while the invoice is a draft, but required before you can send it (Atlas posts the receivable to this account).
- Select your Customer, set the Invoice Date, and pick Payment Terms (the Due Date auto-calculates from the terms).
The invoice number is generated automatically in the form INV-YYYY-NNNN when you save — you don't enter it by hand.
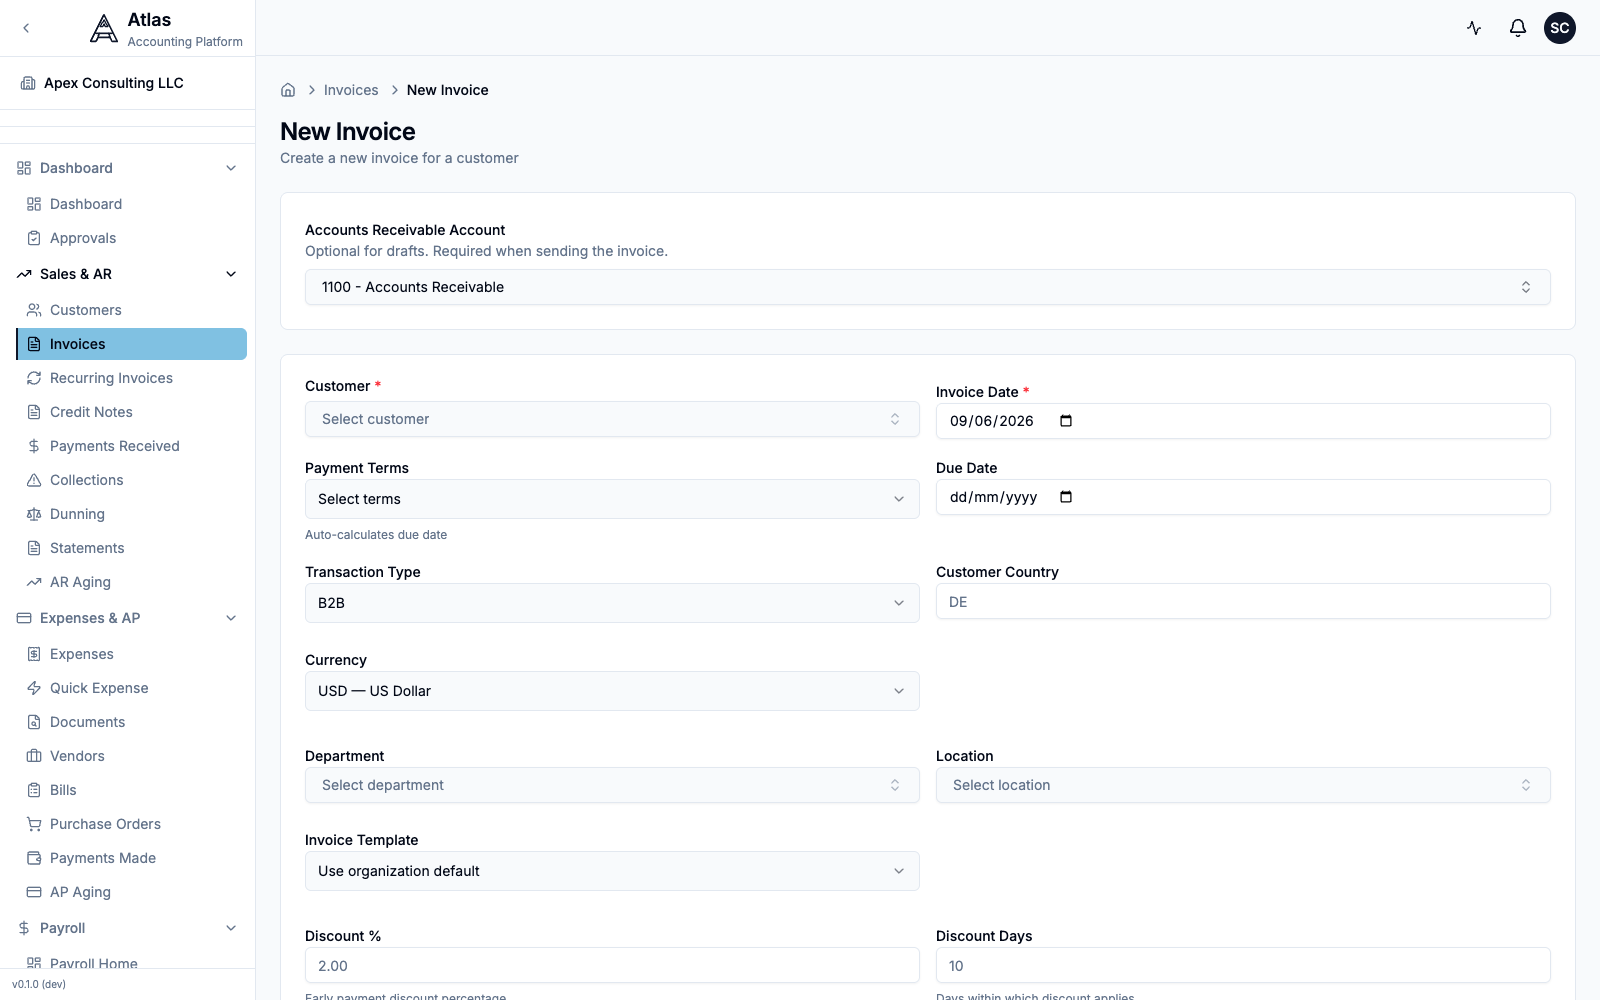 The New Invoice form: the Accounts Receivable Account selector, customer, dates, payment terms, and currency.
Add Line Items
In the Line Items table, click Add Line for each product or service you are billing:
| Column | Description |
|---|---|
| Description | What you are billing for |
| Revenue Account | The income account this line posts to |
| Tax Rate | Per-line tax rate (optional) |
| Qty | Number of units |
| Unit Price | Price per unit |
| Amount | Calculated automatically (Qty × Unit Price) |
Per-line toggles let you mark a line Tax inclusive, Tax Exempt, or Deferred Revenue.
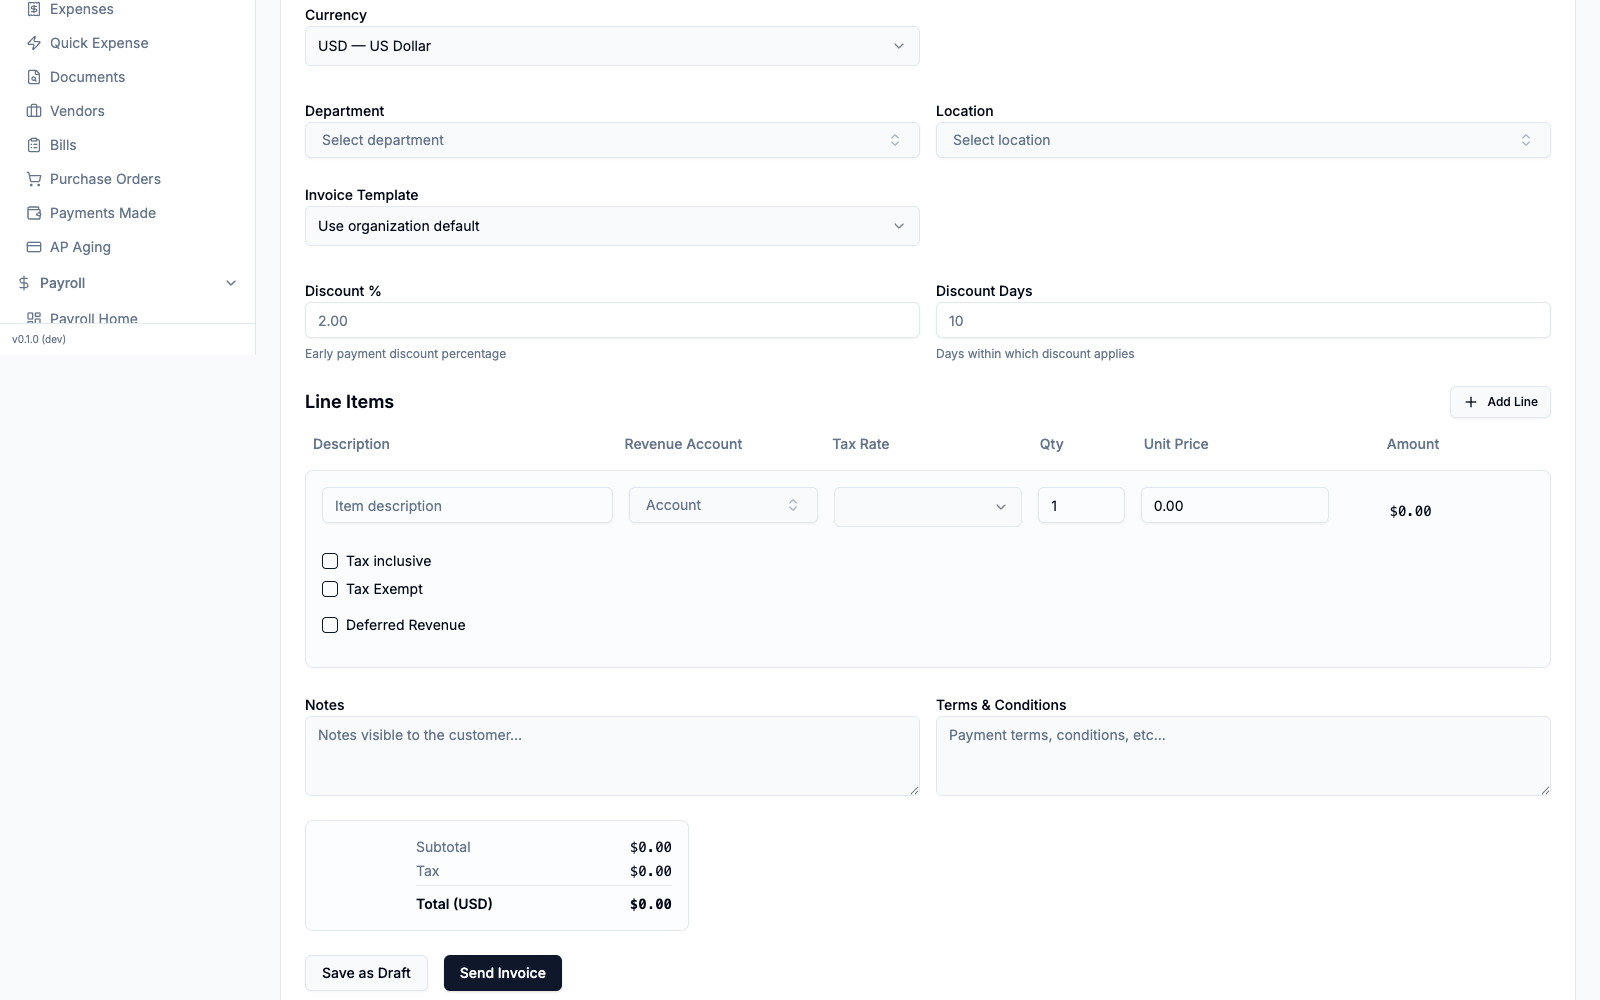 The Line Items table — Description, Revenue Account, Tax Rate, Qty, Unit Price, Amount — with the live Subtotal/Tax/Total summary and the Save as Draft / Send Invoice buttons.
- Review the totals at the bottom — Subtotal, Tax, and Total.
- Click Save as Draft (or Send Invoice to save and send in one step).
Step 3: Review and Send
Open the draft invoice from Sales & AR → Invoices. Its detail page shows the status, dates, amounts, and line items.
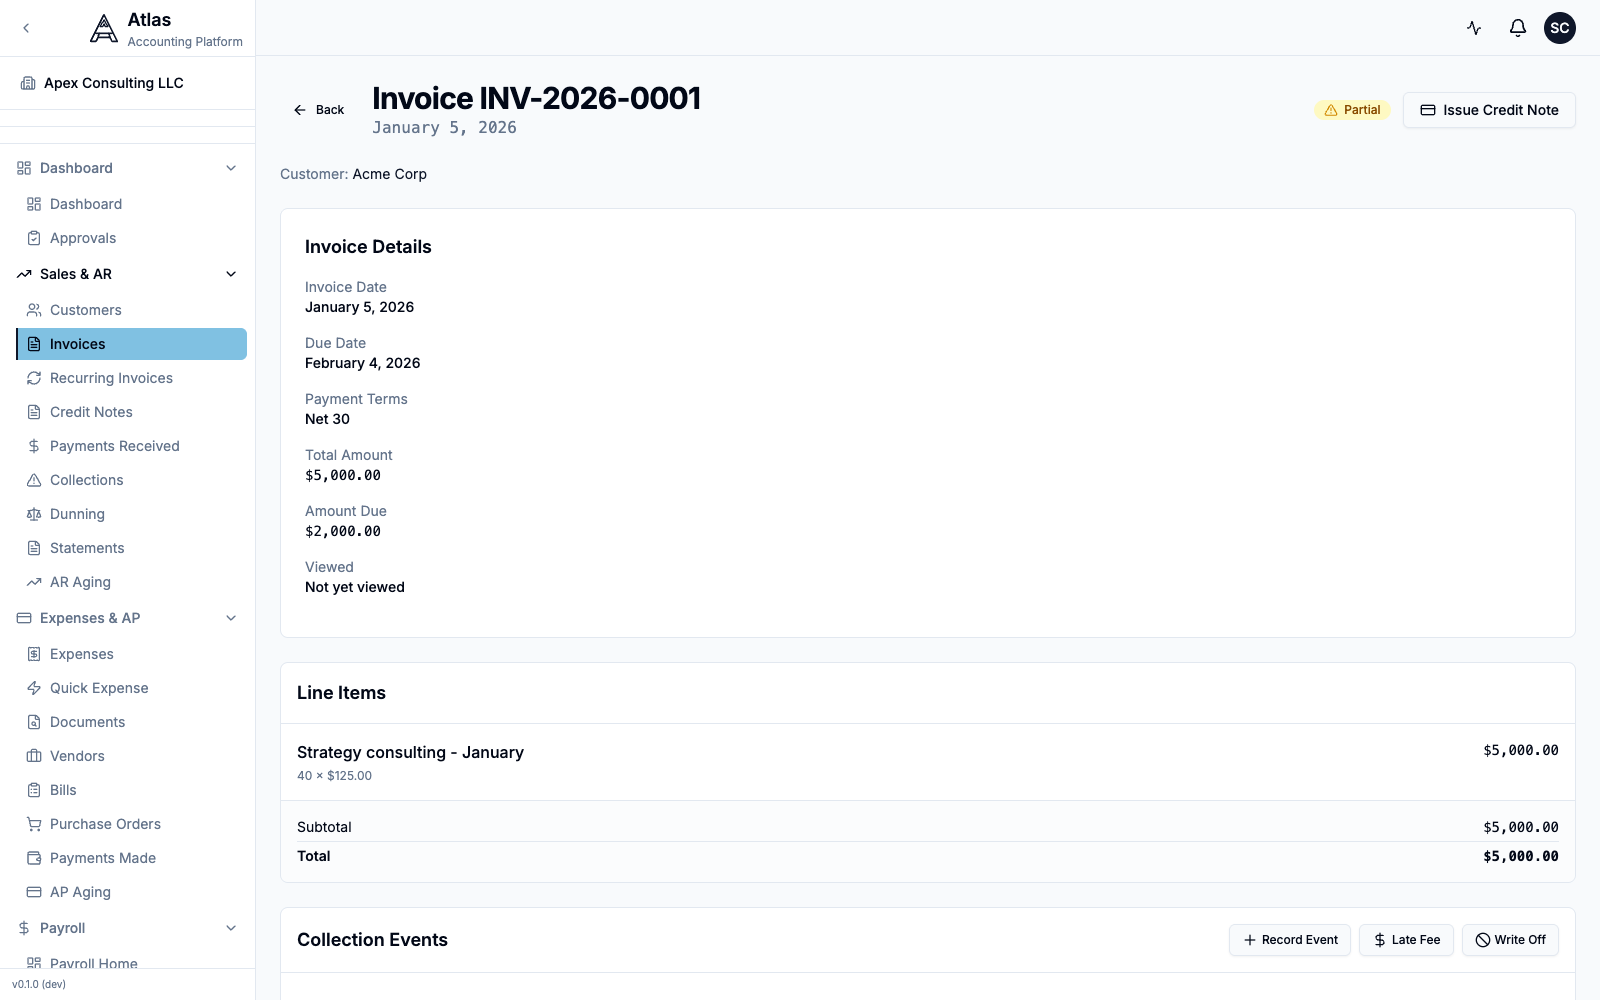 An invoice detail page showing a Partial status, the Total Amount and remaining Amount Due, and the line items.
When you're ready, click Send Invoice. Atlas opens a confirmation dialog summarising the invoice number, amount, due date, and the AR Account the receivable posts to.
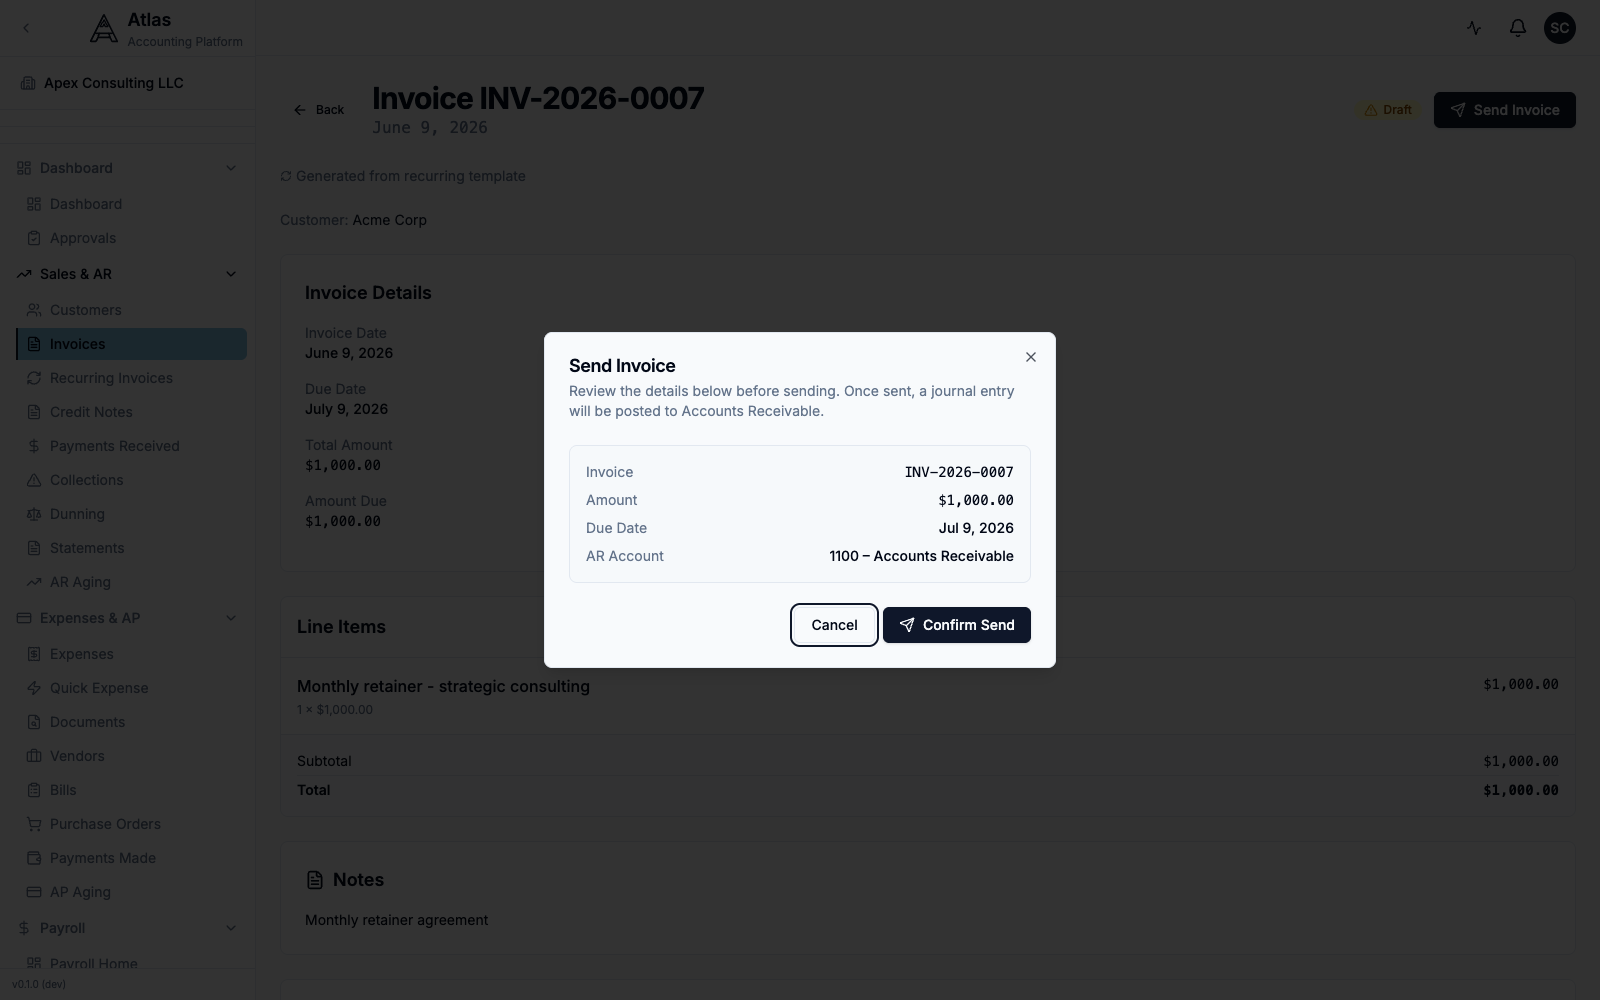 The Send Invoice confirmation dialog, listing the invoice number, amount, due date, and AR account, with Cancel and Confirm Send buttons.
Click Confirm Send. The status changes from Draft to Sent.
Note: Sending an invoice posts a journal entry — Debit Accounts Receivable, Credit Revenue — as the dialog states.
Step 4: Record a Payment
Payments are recorded from the Payments Received screen, not from the invoice itself.
- Go to Sales & AR → Payments Received and click Record Payment.
- Fill in the payment form:
- Accounts Receivable Account (required) — the AR account the payment clears against
- Customer (required) — the payment is applied to that customer's open invoices
- Amount (required) — full or partial payment
- Payment Date (required) — when the payment arrived
- Payment Method (required) — Cash, Check, Credit Card, ACH Transfer, Wire Transfer, Stripe, or Other
- Deposit Account (required) — the bank account receiving funds (e.g., "Business Checking")
- Reference Number — optional check number or reference
- Click Record Payment.
 The Record Payment form: Accounts Receivable Account, Payment Currency, then Customer, Amount, Payment Date, Payment Method, Deposit Account, and Reference Number.
Partial Payments
If the payment is less than the invoice total:
- The invoice status changes to Partial
- The remaining balance (Amount Due) is tracked automatically
- You can record additional payments until the balance reaches zero
Full Payment
When the full amount is received, the invoice status changes to Paid.
What happens behind the scenes: A journal entry is created — Debit Cash/Bank, Credit Accounts Receivable — completing the revenue cycle.
Step 5: View in Reports
Your invoice and payment are now reflected across Atlas:
- Accounts Receivable Aging — shows outstanding invoices by age
- Profit & Loss — revenue appears in the period the invoice was created (accrual basis)
- Cash Flow Statement — payment appears when received
- General Ledger — full audit trail of both journal entries
Open the Reports group in the sidebar to explore each report. The customer's running balance also appears on the Sales & AR → Customers list and on AR Aging.
Troubleshooting
| Issue | Solution |
|---|---|
| Cannot create invoice | Check that you have Bookkeeper role or above |
| Customer not appearing | Ensure the customer was saved (the list lives under Sales & AR → Customers) |
| Send Invoice is disabled | Set the Accounts Receivable Account on the invoice — it's required before sending |
| Tax not calculating | Set a Tax Rate on the line item (it's a per-line selector, not an invoice-wide field) |
| Invoice stuck in Draft | Open it and click Send Invoice, then Confirm Send, to advance the status |
Related Guides
- Invoicing & Accounts Receivable — recurring invoices, credit notes, and collections
- Chart of Accounts — setting up revenue and AR accounts
- Reports & Analytics — understanding your financial reports
What's Next
Now that you have created your first invoice, try:
- Setting up recurring invoices for monthly clients
- Importing bank statements to reconcile payments automatically
- Running the AR Aging report to monitor outstanding receivables