AI Categorization
Train the AI to auto-categorize bank transactions
AI Categorization
Reading time: 8 minutes
Learn how Atlas's AI engine categorizes bank transactions, how to review its suggestions, create custom rules, and read its performance metrics. By the end of this tutorial you'll know how to clear the AI Review queue quickly and confidently. Every screen below is the actual product.
Prerequisites
- An Atlas account with Bookkeeper role or above
- At least one bank account with imported, pending transactions
- Some transactions already categorized (the AI learns from history)
Step 1: How AI Matching Works
Atlas categorizes the pending transactions in your bank feed (reconciled and already-matched rows are excluded — categorize those manually from the bank account page). Each suggestion gets a confidence score, shown as a percentage on its row.
The auto-apply threshold is 70%. That single cutoff drives the queue tabs:
| Confidence | Tier | Queue tab |
|---|---|---|
| 90%+ | High | Auto-Categorized |
| 70–90% | Medium | Auto-Categorized |
| Below 70% | Low | Needs Review |
Suggestions at or above 70% can be applied in bulk with Accept High Confidence; anything below 70% lands in Needs Review for a human decision.
Step 2: Review AI Suggestions
- Open Accounting → AI Review from the sidebar to reach the AI Review Queue.
- Click Run AI Categorization. Atlas queues a background job (this requires the worker to be running) and, once it finishes, fills in a suggested Account and a Confidence score for each pending transaction.
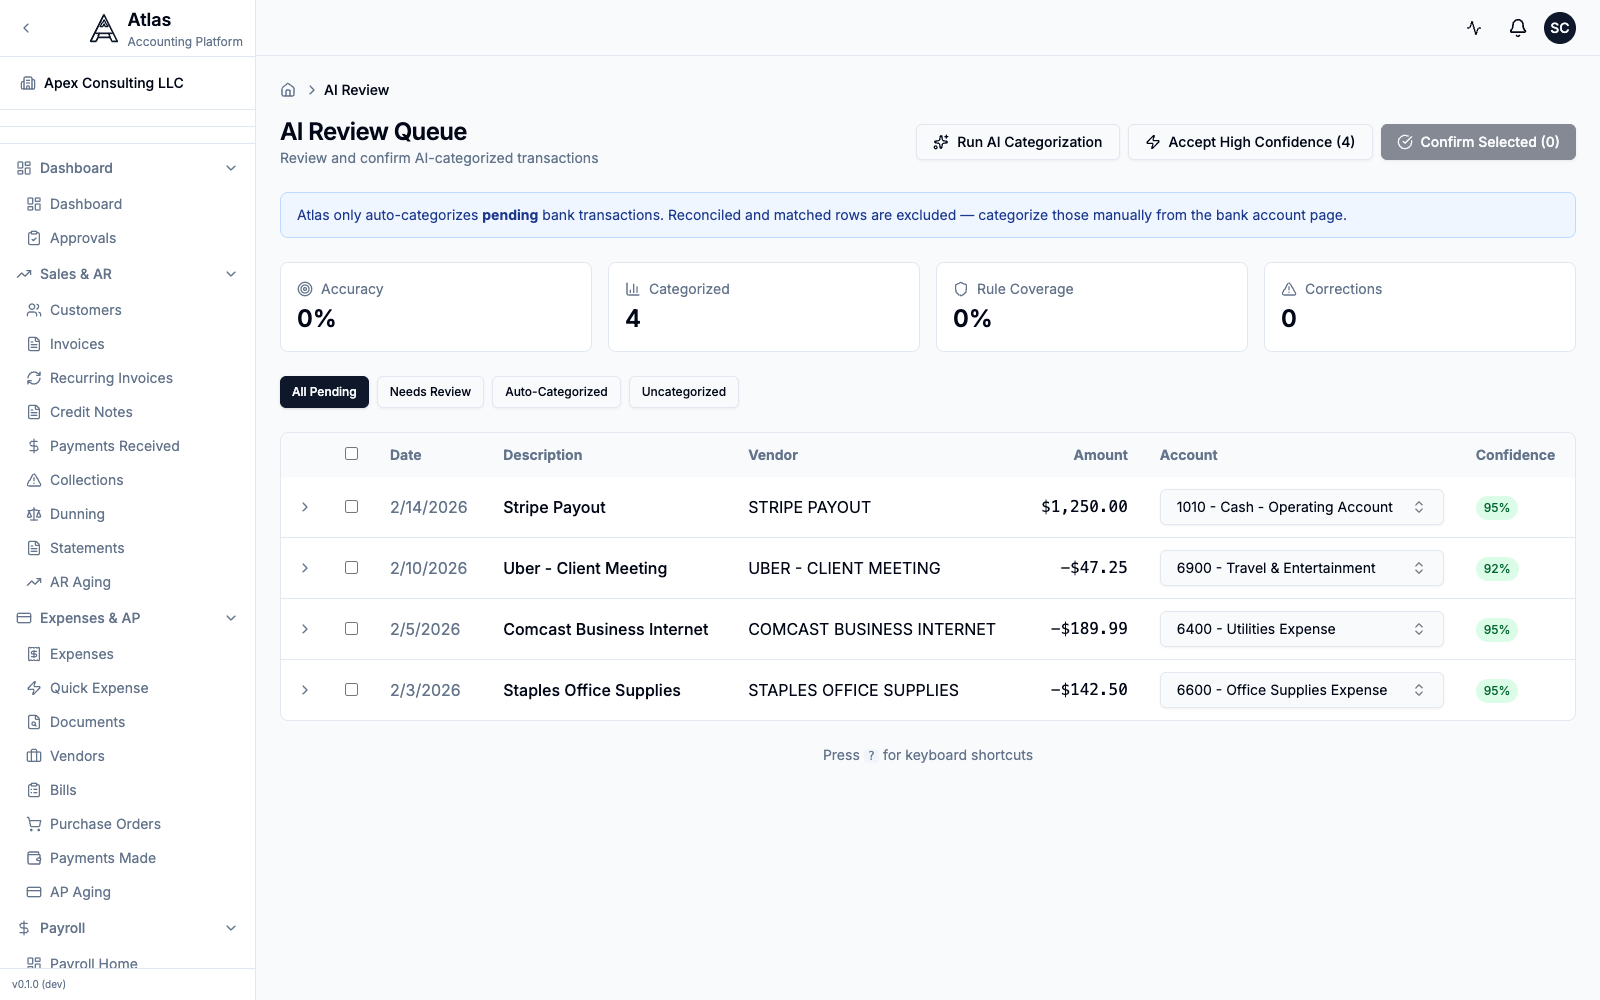 The AI Review Queue with metric cards across the top and four pending transactions, each with a suggested GL account and a confidence badge.
Each row shows the Date, Description, Vendor, Amount, the suggested Account (an inline dropdown you can change), and the Confidence badge. The tabs — All Pending, Needs Review, Auto-Categorized, Uncategorized — filter the queue by status.
Expand a row to read the AI's reasoning for its suggestion:
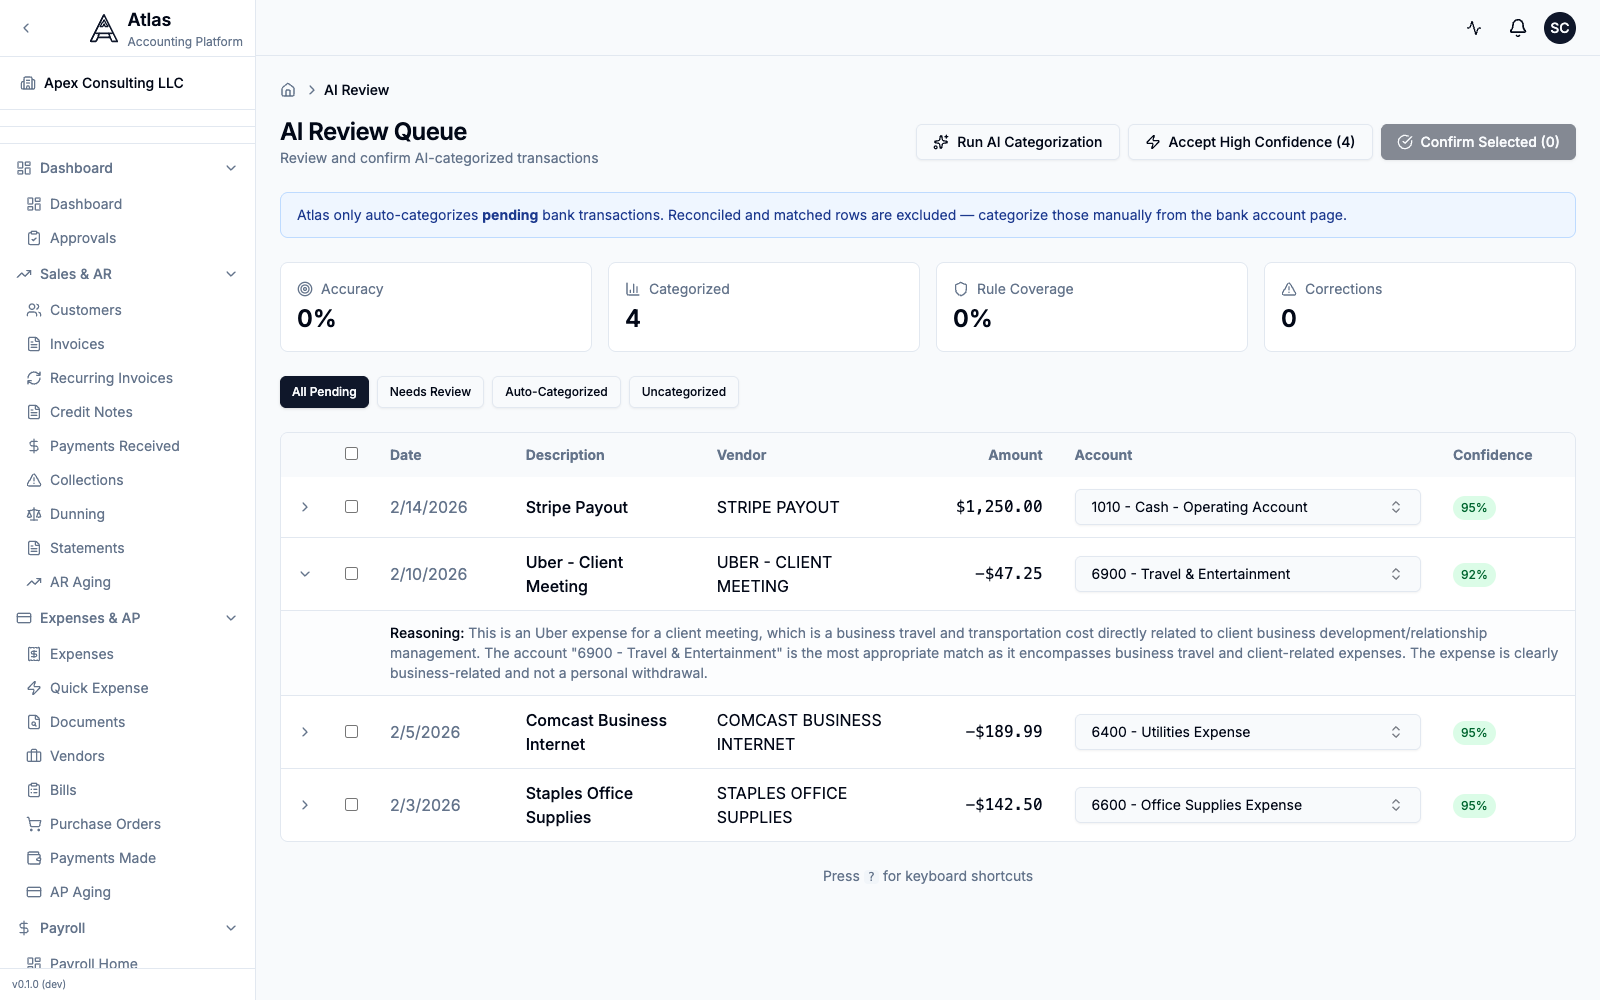 An expanded transaction row showing the AI's plain-language reasoning for the suggested account.
Taking action
- Change the account — pick a different GL account from the row's dropdown to override the suggestion.
- Select rows — tick the checkboxes for the transactions you want, then click Confirm Selected to post them.
- Accept High Confidence — one click confirms every suggestion at or above the 70% threshold.
Tip: Use Accept High Confidence to clear the bulk of the queue, then work through the Needs Review tab by hand.
Step 3: Create Custom Rules
Rules give you deterministic control: when a transaction matches a rule, Atlas assigns the account you chose.
- Go to Settings → AI Rules.
- Click New Rule (or Create First Rule if you have none yet).
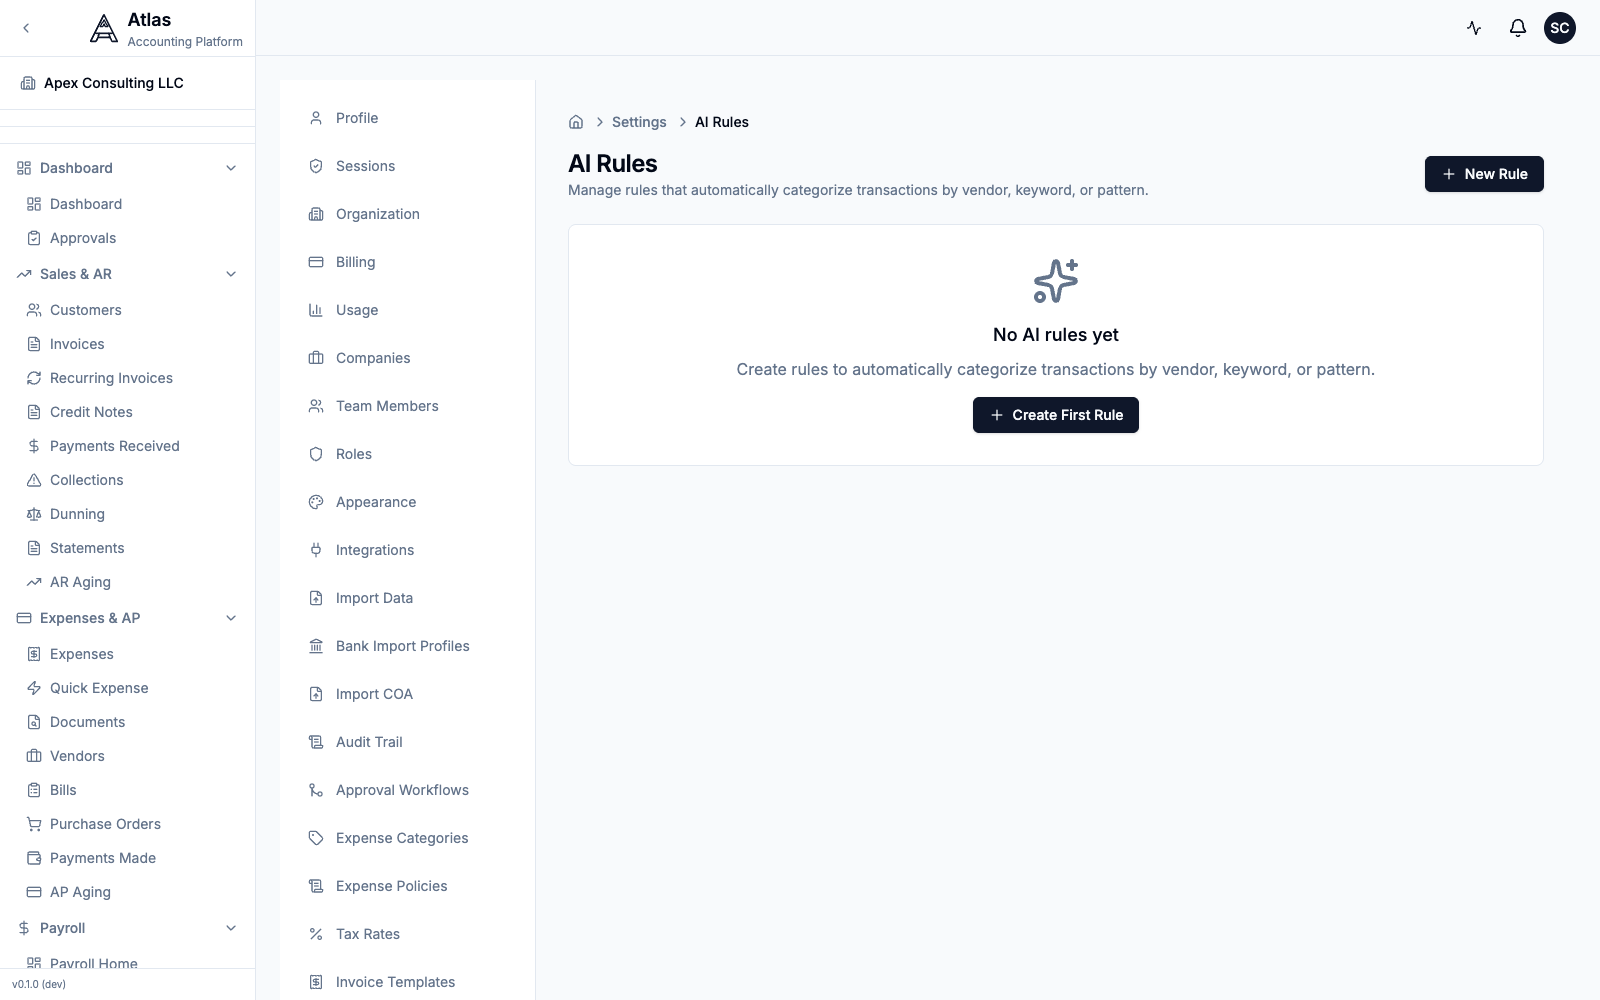 The AI Rules page under Settings, with the New Rule entry point and an empty-state prompt.
- In the Create AI Rule dialog, choose a Rule Type, enter a Match Value, and pick the Account to assign:
| Rule Type | Matches on… | Example match value |
|---|---|---|
| Vendor (Exact Match) | The normalized vendor name, exactly | STAPLES OFFICE SUPPLIES |
| Vendor (Fuzzy Match) | The vendor name, approximately | Comcast |
| Keyword | A keyword anywhere in the description | AWS |
| Regex Pattern | A regular expression against the description | AMZN.* |
- Click Create Rule.
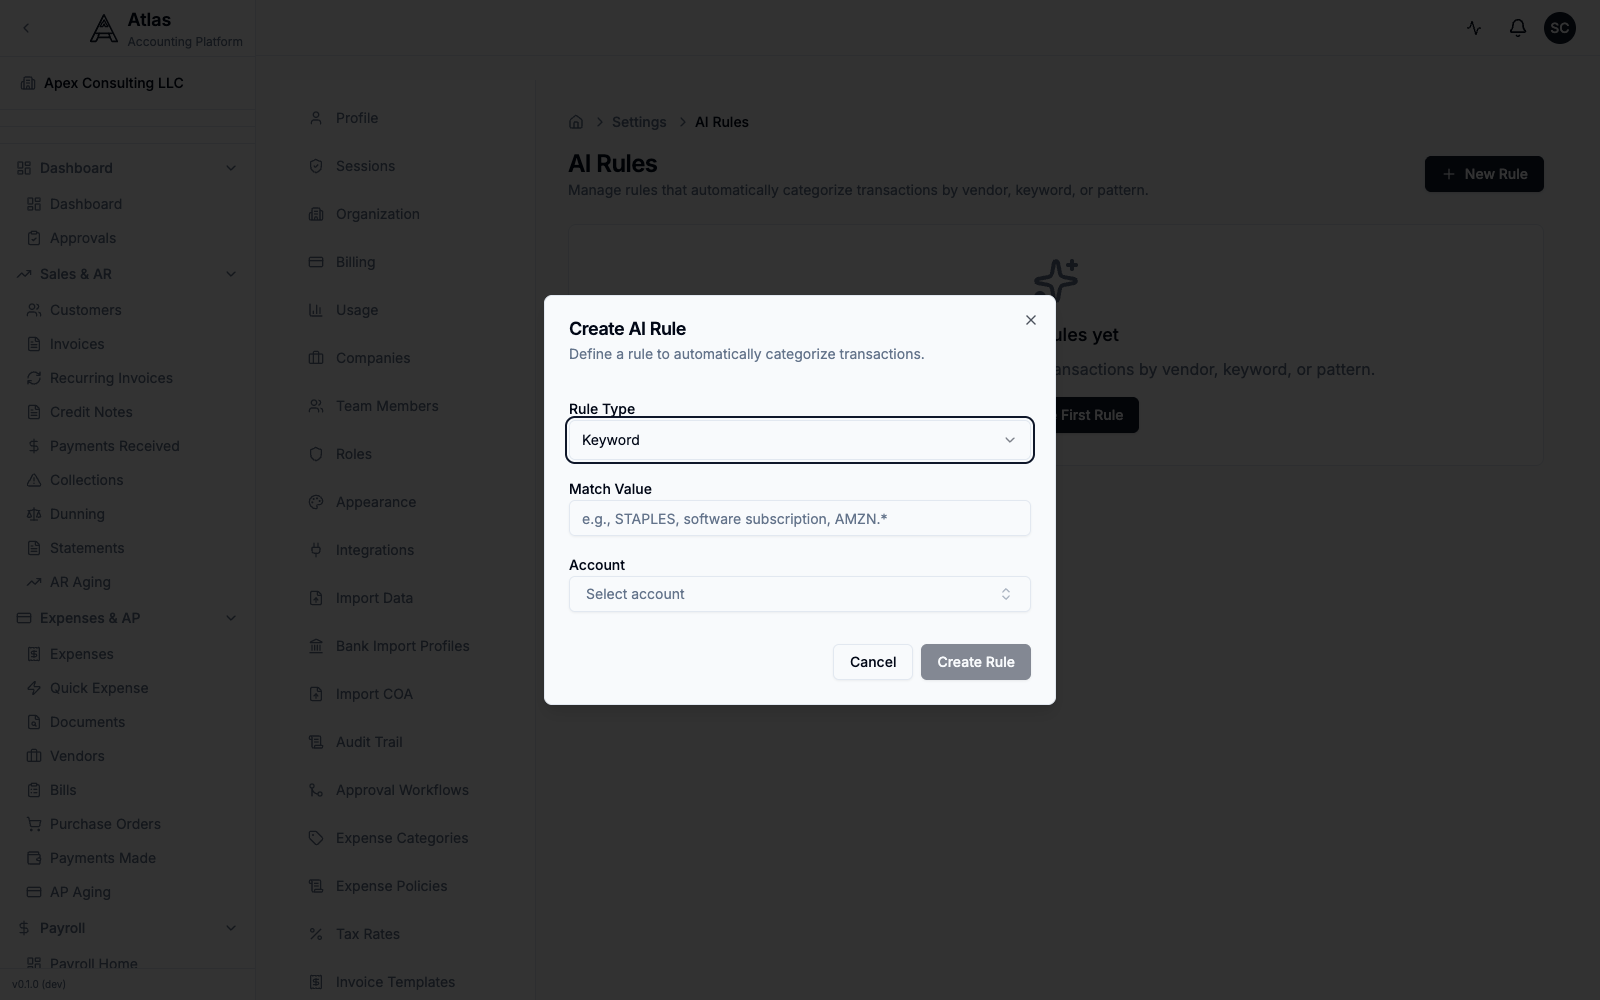 The Create AI Rule dialog: Rule Type (Keyword selected), a Match Value field, and an Account selector.
Example Rules
| Rule Type | Match Value | Account |
|---|---|---|
| Keyword | AWS | Cloud Hosting Expense |
| Keyword | GUSTO | Payroll Expense |
| Vendor (Fuzzy Match) | Comcast | Utilities Expense |
| Regex Pattern | STRIPE.* | Merchant Revenue |
Step 4: Track AI Performance
Atlas summarises how the AI is doing on the AI Review → Metrics page (open it from the Metrics link on the AI Review queue):
- Accuracy — share of suggestions accepted without correction
- Categorized — number of transactions the AI has categorized
- Rule Coverage — share of transactions matched by one of your rules
- Corrections — how often you overrode a suggestion
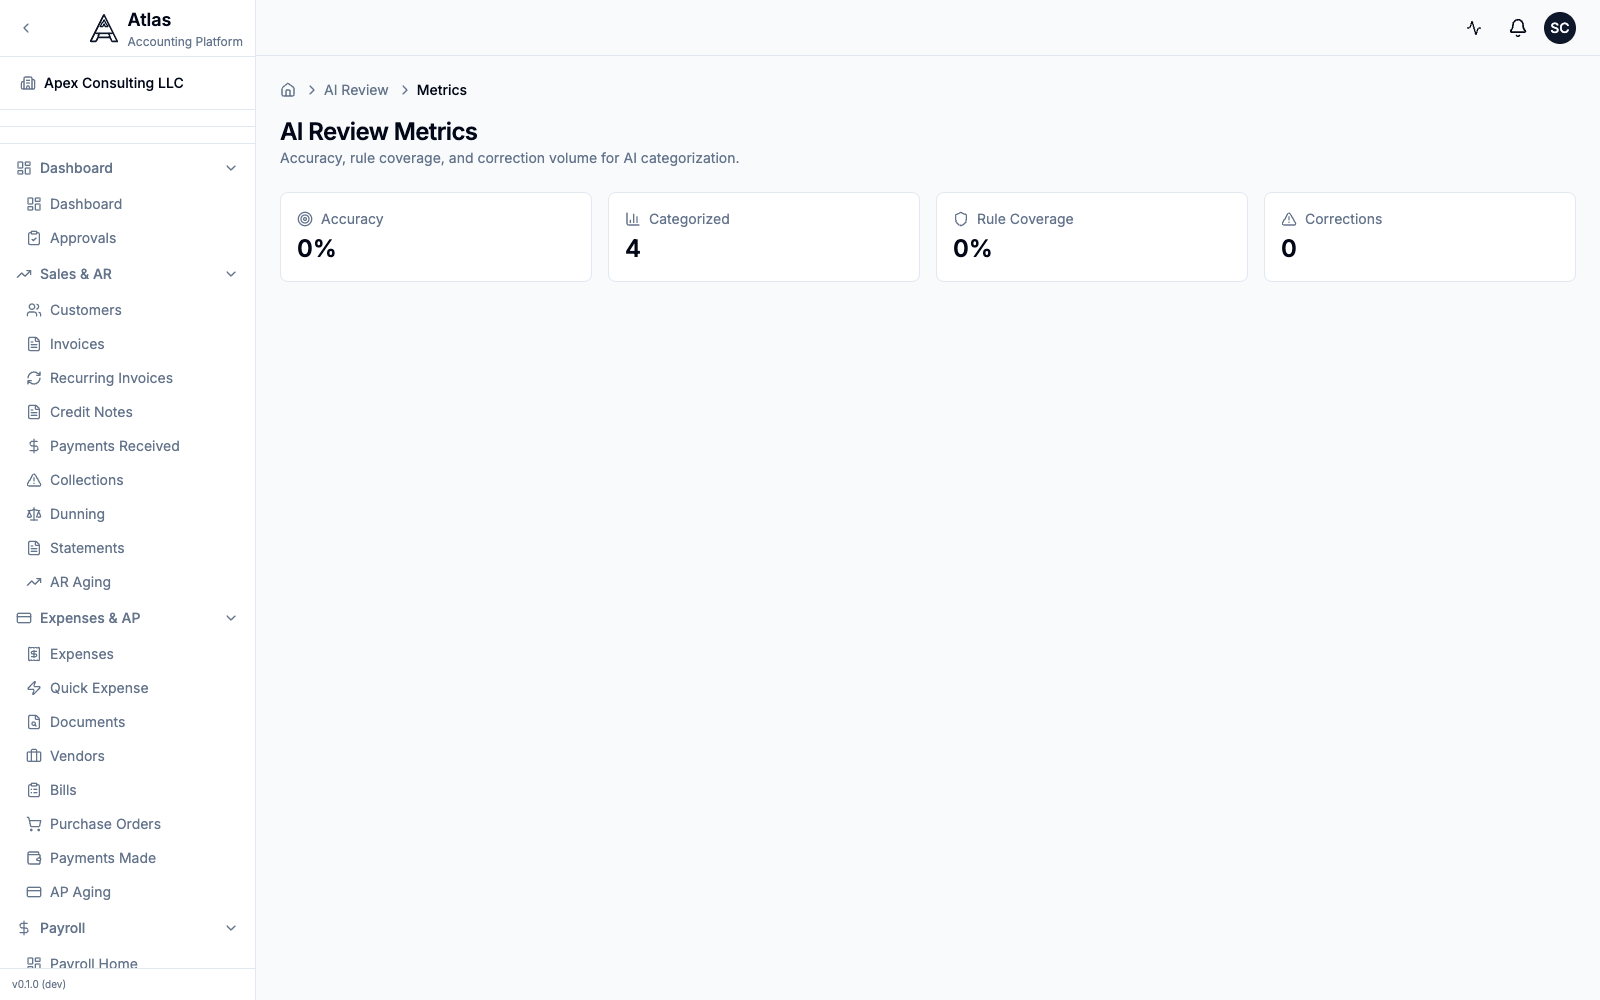 The AI Review Metrics page with Accuracy, Categorized, Rule Coverage, and Corrections cards.
Feedback loop
Import → Run AI Categorization → You Review → AI Learns → Better Suggestions
Every correction teaches the engine. As Rule Coverage and Accuracy climb, more transactions land in Auto-Categorized and clear with a single Accept High Confidence click. For vendors the AI keeps getting wrong, add a rule (Step 3) for deterministic control.
Troubleshooting
| Issue | Solution |
|---|---|
| Queue shows no confidence/N/A | Click Run AI Categorization and wait for the background job to finish |
| AI not suggesting anything | Need more historical data — categorize transactions manually first |
| A transaction never appears | Only pending rows are categorized; reconciled/matched rows are excluded |
| Wrong suggestions repeated | Add a rule in Settings → AI Rules to override the AI for that pattern |
| Rule not applying | Check the Rule Type and Match Value against the transaction's vendor/description |
Related Guides
- Banking & Reconciliation — statement import and reconciliation workflow
- Bank Reconciliation Tutorial — complete reconciliation walkthrough
- Chart of Accounts — organizing accounts for clean categorization
What's Next
Now that your AI is working:
- Create rules in Settings → AI Rules for your top vendors to ensure consistent categorization
- Check AI Review → Metrics to watch accuracy and rule coverage improve
- Use Accept High Confidence each time you import to clear the queue fast
- Run a bank reconciliation to close out the month