Bank Reconciliation
Import statements and reconcile with AI matching
Bank Reconciliation
Reading time: 10 minutes
Import a bank statement, let Atlas match the transactions, and reconcile your account until the bank balance ties exactly to your books. This walkthrough uses a real Atlas account — every screen below is the actual product.
Prerequisites
- An Atlas account with the Bookkeeper role or above
- A bank account added in Atlas (Banking → Add Bank Account)
- A bank statement file in CSV or Excel (.xlsx) format
Step 1: Open the bank account
Go to Banking in the sidebar. Each connected account shows its type, masked number, current balance, and the date it was last reconciled.
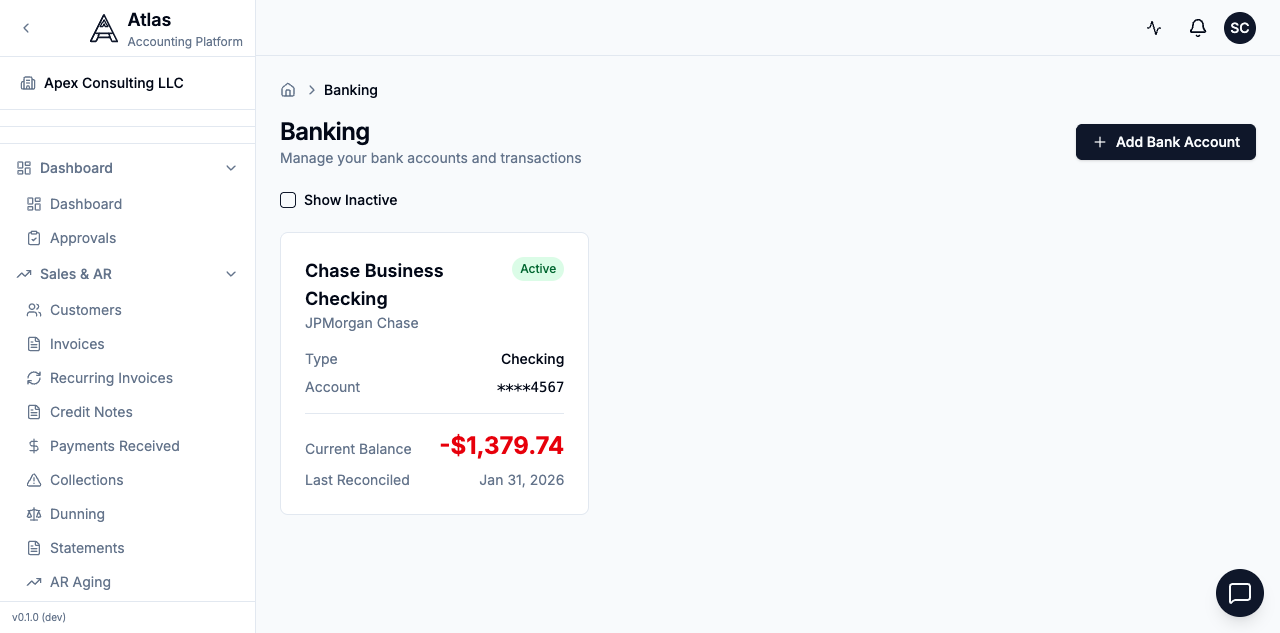 The Banking page lists every connected account with its current balance and last-reconciled date.
Click an account card to open its detail page. This is your workspace for everything below — importing statements, matching transactions, and reconciling.
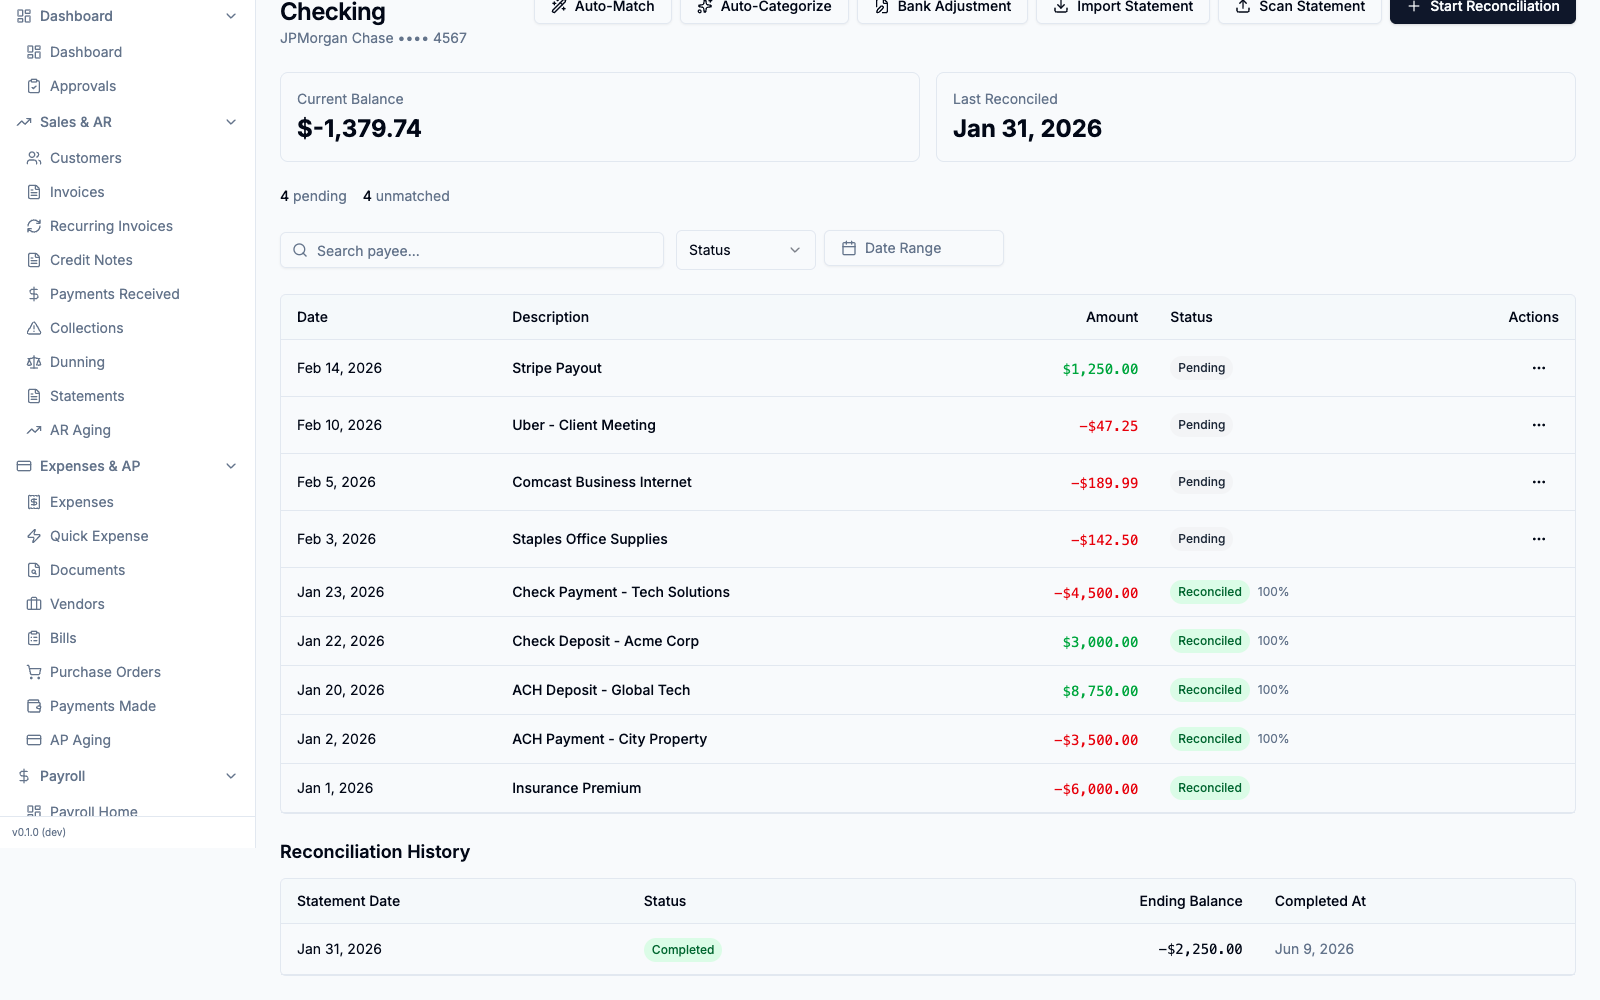
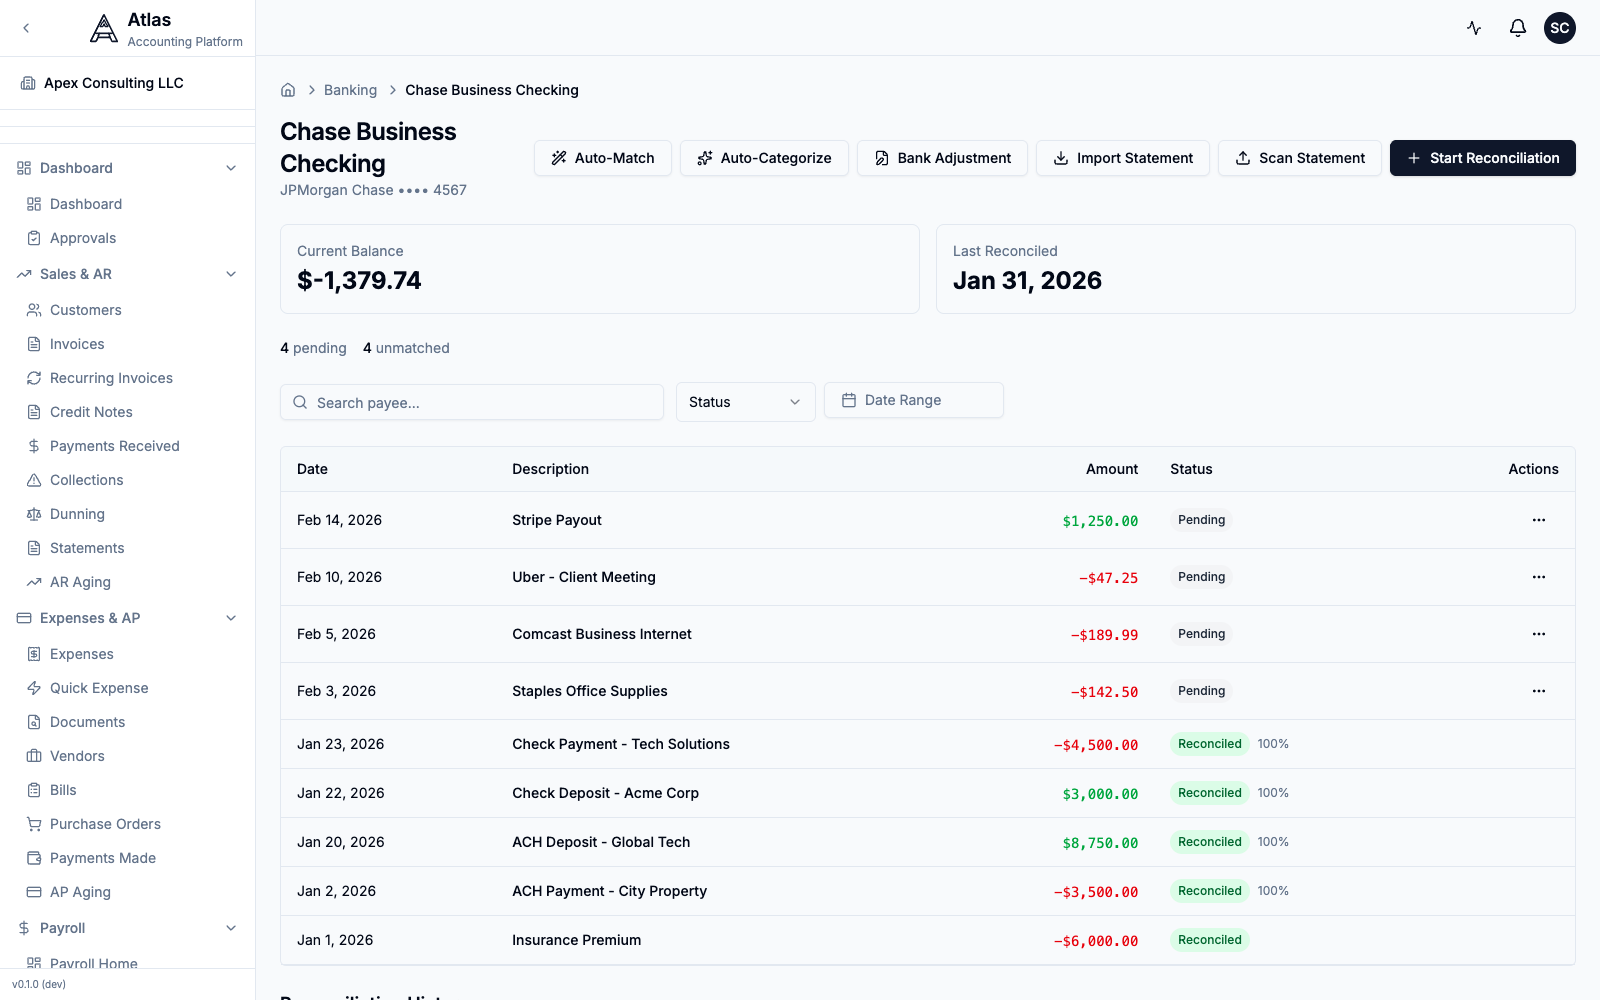 The account detail page: action buttons across the top, the transaction list below, with a status and match percentage on every row.
Across the top you have six actions:
| Action | What it does |
|---|---|
| Auto-Match | Matches feed transactions to existing invoices, bills, and prior rules |
| Auto-Categorize | Uses AI to suggest a GL account for uncategorized transactions |
| Bank Adjustment | Records a manual adjustment (interest, fees) directly against the book |
| Import Statement | Opens the statement import wizard (CSV / Excel) |
| Scan Statement | Extracts transactions from a PDF or photo statement via OCR |
| Start Reconciliation | Begins a reconciliation against a statement ending balance |
The counters beneath the title — pending and unmatched — tell you how much work is outstanding before the account can be reconciled.
Step 2: Import your bank statement
Click Import Statement to open the five-step wizard: Upload → Map Columns → Preview → Import → Done.
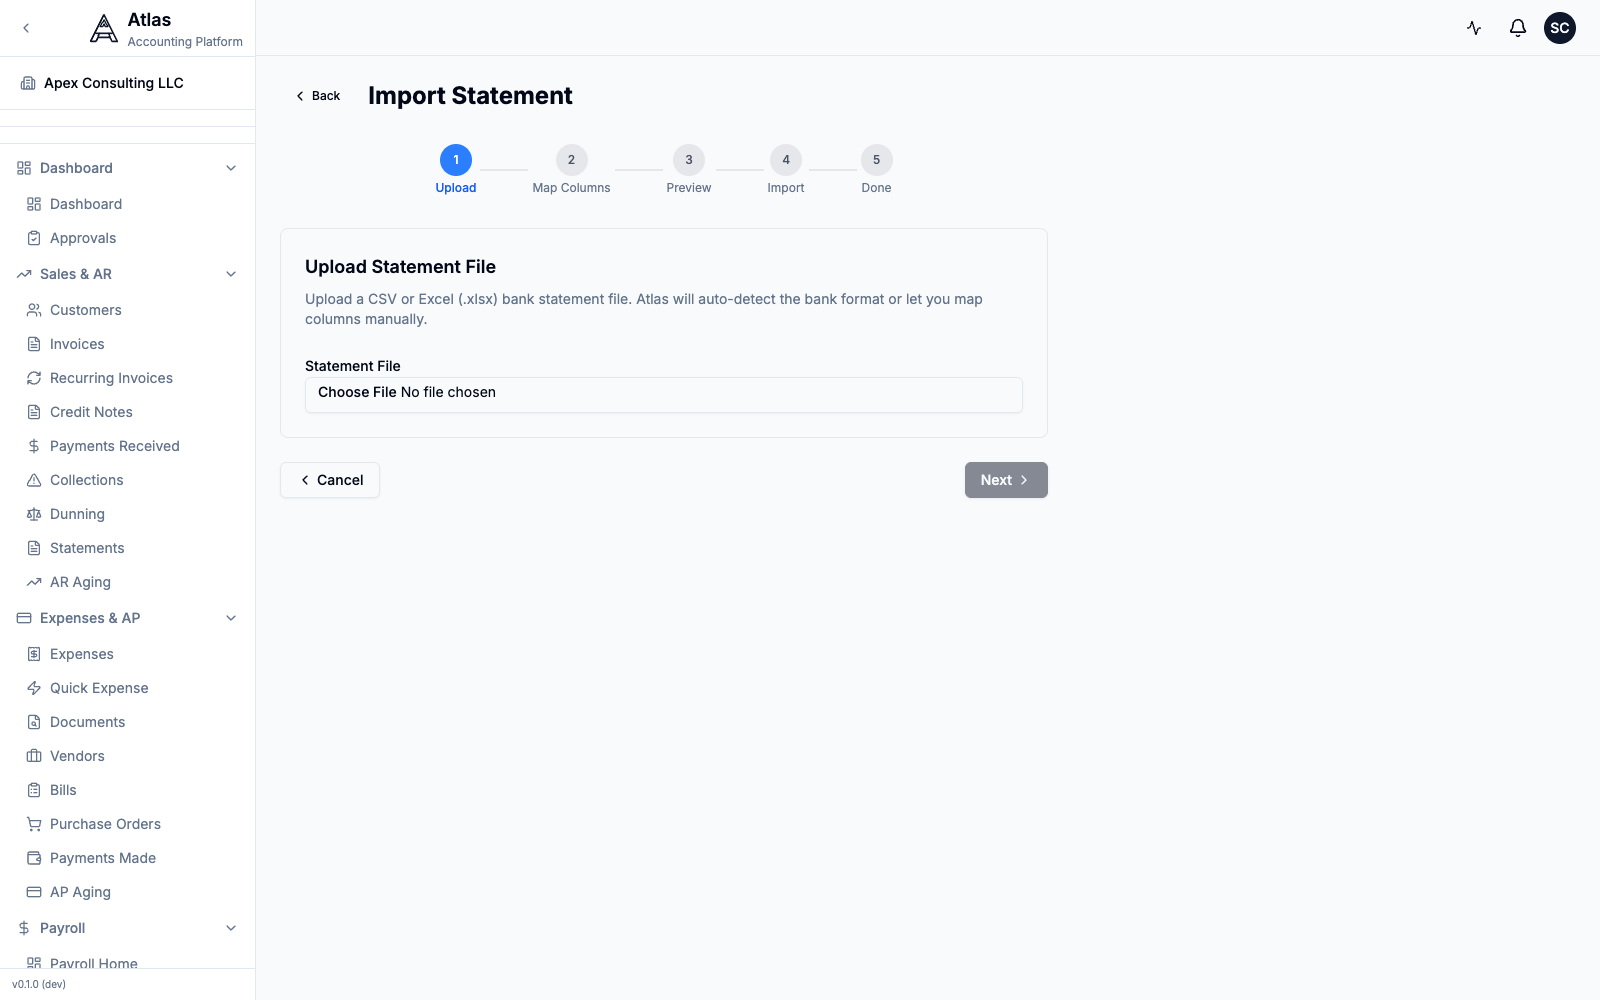 The Import Statement wizard. Step one accepts a CSV or Excel file and auto-detects the bank's column layout.
- Upload — choose a
.csvor.xlsxfile. Atlas auto-detects common bank formats. - Map Columns — if the format isn't recognised, map Date, Description, and Amount yourself.
- Preview — review the parsed rows, date range, and opening/closing balances before committing.
- Import — Atlas writes the transactions into the account's feed and flags duplicates (matched by date + amount + description).
- Done — you're returned to the account, with the new transactions listed as Pending.
Step 3: Match and categorize transactions
Imported transactions arrive unmatched — they exist in the bank feed but aren't yet tied to a general-ledger entry. A transaction must be categorized before it can be cleared in a reconciliation, so do this first.
You have three ways to clear the backlog:
- Auto-Match — confirms transactions that line up with an existing invoice or bill (e.g. a customer payment against an open invoice). High-confidence matches are applied automatically.
- Auto-Categorize — for transactions with no document to match, Atlas's AI suggests a GL account based on the description and your past corrections. The more you reconcile, the sharper it gets.
- Per-transaction — open a row's Actions menu to set the account and payee by hand, split one transaction across several accounts, or attach a receipt.
Splitting transactions — if one bank line covers multiple categories, choose Split, add a line per account, and make the line amounts sum to the original. Atlas blocks the split until it balances.
Reconciled rows display a green Reconciled badge and a match percentage; pending rows stay marked Pending until you act on them.
Step 4: Reconcile
Once every transaction on your statement is categorized, click Start Reconciliation. This opens a four-step wizard.
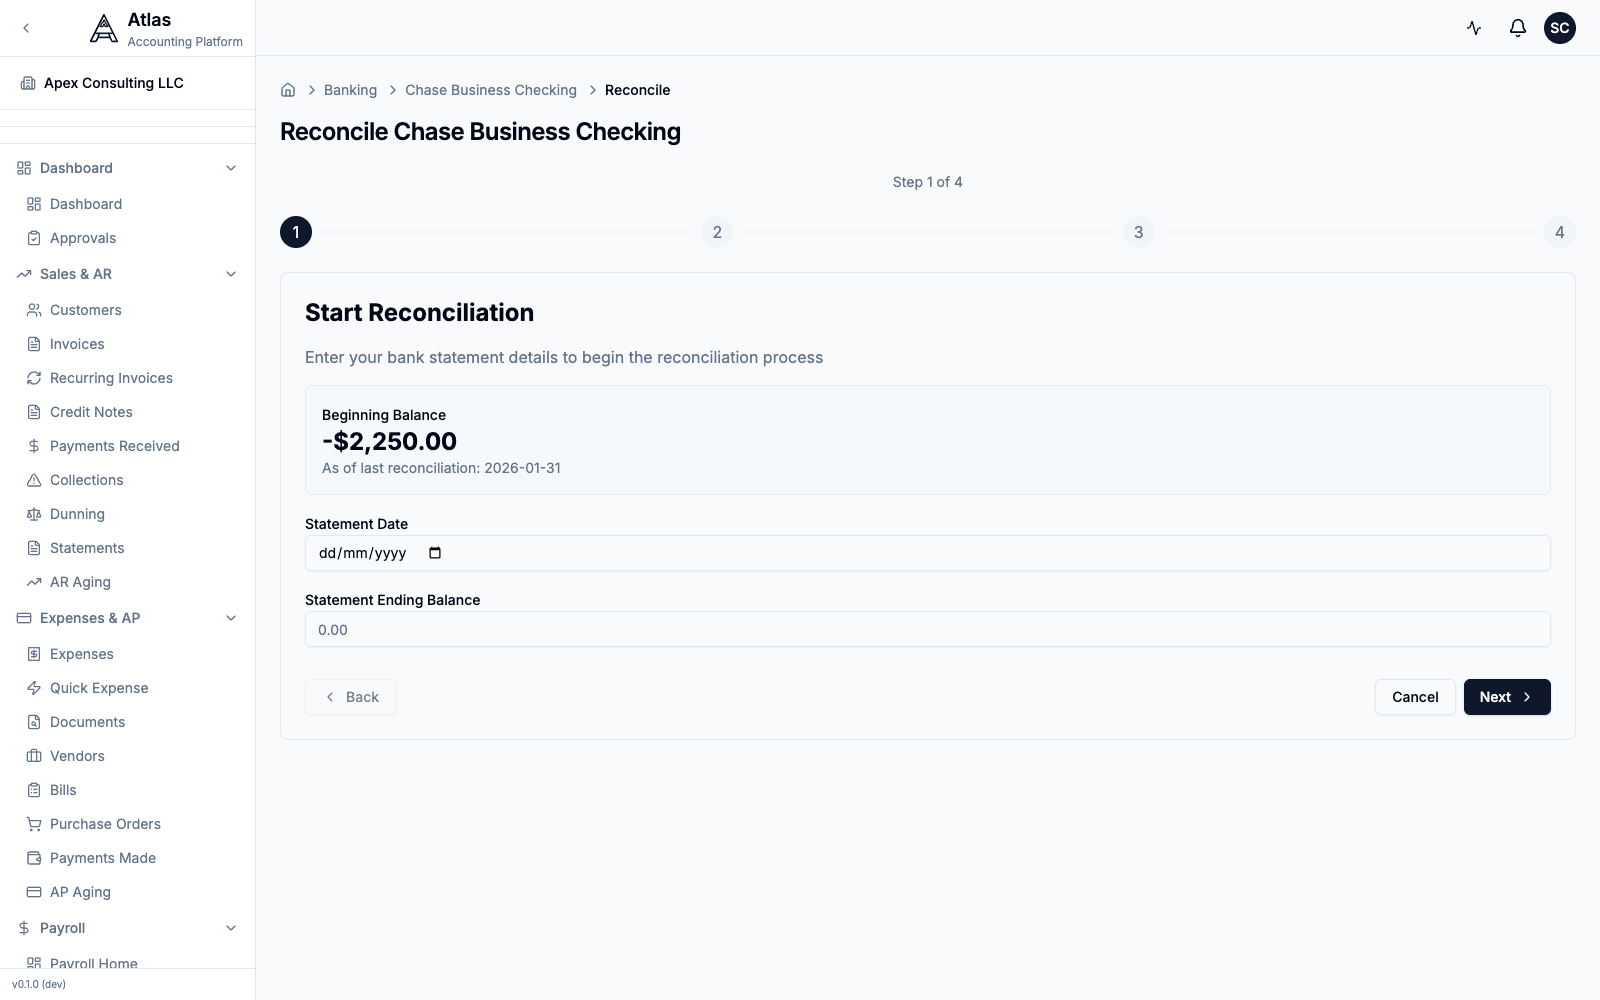 Reconciliation step one: Atlas carries the beginning balance forward from your last reconciliation; you enter the statement date and its ending balance.
- Start — the Beginning Balance is carried forward automatically from your last reconciliation. Enter the Statement Date and the Statement Ending Balance from your bank, then click Next.
- Clear Transactions — check off each transaction that appears on your statement. A running tally updates live:
- Cleared Deposits and Cleared Withdrawals
- Cleared Balance (beginning balance ± cleared activity)
- Difference — the gap between your cleared balance and the statement ending balance
- Review — confirm the cleared set and the resulting balances.
- Complete — when the Difference is $0.00, the Complete Reconciliation button unlocks. Click it to lock the period.
Important: if the difference won't reach zero, do not force it. Check for:
- Transactions on the statement you haven't imported yet
- Bank fees or interest not recorded (use Bank Adjustment)
- Pending transfers between accounts
- Duplicate entries
A non-zero difference is the system telling you the books and the bank disagree — find the missing item rather than overriding it.
Step 5: Review the results
After you complete a reconciliation:
- The account header updates its Last Reconciled date.
- Cleared transactions are locked — they can't be edited without un-reconciling first.
- The Reconciliation History table at the bottom of the account records every reconciliation with its statement date, status, ending balance, and completion timestamp.
 The Reconciliation History table records each completed reconciliation with its ending balance and completion date.
If you started a reconciliation by mistake, void it from the history and the account returns to Start Reconciliation — voided entries are hidden from the default view.
Speeding up future reconciliations with rules
Categorization rules let Atlas clear recurring transactions automatically on import:
- Define a condition — description contains, an amount range, or a transaction type (debit/credit).
- Set the action — assign an account, set a payee, and optionally auto-approve high-confidence matches.
- Save the rule. It applies to every future import, shrinking the unmatched count before you even open the account.
Troubleshooting
| Issue | Solution |
|---|---|
| Import fails | Check the format — Atlas imports CSV and Excel (.xlsx) only |
| Statement is a PDF or photo | Use Scan Statement (OCR) instead of Import Statement |
| Duplicate transactions | Atlas flags duplicates by date + amount + description on import |
| "No transactions found" when clearing | The feed items aren't categorized yet — run Auto-Match / Auto-Categorize first |
| Difference won't reach zero | Look for un-imported lines, unrecorded bank fees, or pending transfers |
| AI suggestions are wrong | Correct them — Auto-Categorize learns from every correction |
Related Guides
- Banking & Reconciliation — advanced import options and OCR scanning
- AI Categorization — train the AI for better matching
- Reports & Analytics — bank reconciliation reports
What's Next
With your first reconciliation complete, try:
- Setting up categorization rules for recurring transactions
- Connecting additional bank accounts for a complete picture
- Running the Month-End Close to lock the reconciled period